Ad Hoc Introduction
This article gives details on how to set up and use Solver’s Ad Hoc Reporting feature in the Cloud portal. Ad Hoc Reporting is a user-friendly tool that provides a controlled grid for users to drag and drop fields from their Data Warehouse or supported ERPs, enabling quick data analysis. Ad Hoc Reporting is convenient for users who need to quickly analyze data without going through a detailed report-creation process.
Ad Hoc Reporting is included with your Solver purchase. Refer to the Administration materials for details on assigning users to the Ad Hoc application.
Security settings configured in the Administration screens are inherited, ensuring users see only the data assigned to them.
Ad Hoc offers the following highlighted features:
- Convenient drag and drop functionality to create “reports.”
- Grouping and sorting functionality
- Filtering capabilities
- Export to Excel functionality
- Data formatting including
- Currency Symbols
- Number of decimal places
- Number of rows
- Auto-refresh capabilities when making changes to reports
- Pivot (transpose) the data
Menu and Interface
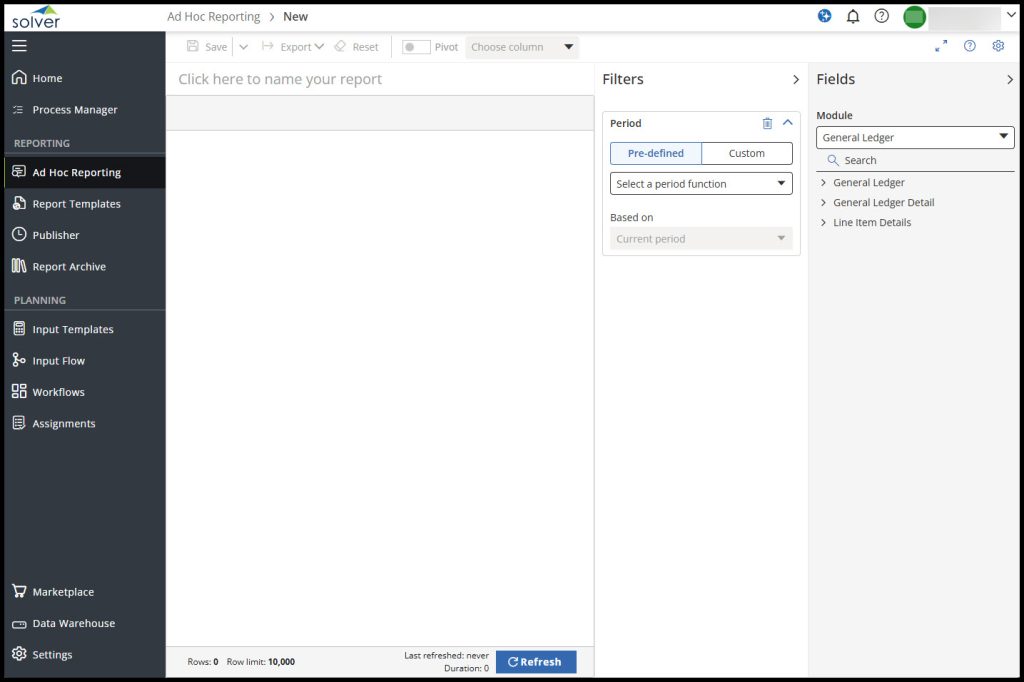
Toolbar Actions
The top toolbar contains options to:
- Save or Save a Copy
- Saves the current report layout and settings for future use.
- Export
- Exports the displayed report data to Excel.
- Revert to Saved
- Clears all newly selected fields, filters, and layout changes, starting fresh from the last time you saved the report.
- Pivot
- Switches the report into pivot mode for summarized or grouped analysis, similar to the Excel feature.
- Once enabled, you can also choose the module to display as the pivot column.
- Activate Full Screen
- Click the arrows button to fill the entire window with your report.
- Help
- Pressing the question mark button activates relevant pop-up messages to guide you through using Ad Hoc.
- Settings
- When the settings button is pressed, a side menu will appear with several options to customize your Ad Hoc experience.
Ad Hoc Settings
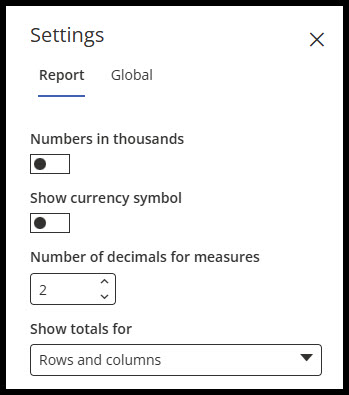
On the side panel that appears for the settings menu, you will see two tabs, Report and Global. If changed, these will go into effect once the report has been refreshed.
Report Tab Settings:
- Numbers in thousands
- Toggling this on will change the amounts in the report to an abbreviated format, omitting the thousands digits for easier digestion.
- Show currency symbol
- Toggling this on will add the localized currency symbol before an amount.
- Number of decimals for measures
- Changing the number on this counter will add or subtract the number of digits past the decimal shown on your report.
- Show totals for:
- The dropdown menu for this setting lets you display or remove the row on the report that shows the totals for each column, if relevant. You may choose to show this for rows and columns, for rows only, for columns only, or none at all.
Global Tab Settings
- Auto refresh on load
- Toggling this on will allow users to refresh their data when they load into the report. Leaving it off will keep the data unchanged from the last time the report was modified.
- Auto refresh on change
- Toggling this on will allow users to refresh their data whenever the report is changed. Leaving it off will keep the data unchanged until the refresh button has been pressed.
- Row limit
- Based on your data set, you may select a row limit that controls how many rows are loaded at one time, from 1000 to 100,000, or no limit. Larger datasets will lead to longer load times when a report is opened or refreshed.
How to Use Ad Hoc for the First Time
After logging into Solver,
- Navigate to the Ad Hoc Reporting menu option
- Users who are using Ad Hoc for the first time or have no saved Ad Hoc reports are directed to the Get Started screen. Click on “Get Started” to begin.
- Users will have one of the following experiences based on their tenant configuration
- Tenants configured with a single connection to the Data Warehouse Only will begin loading the interface. This may take a few seconds to load
- Tenants configured with multiple connections, one to the Data Warehouse and additional connections configured to their ERP via the Hybrid Agent, you will be prompted to select an integration and a company
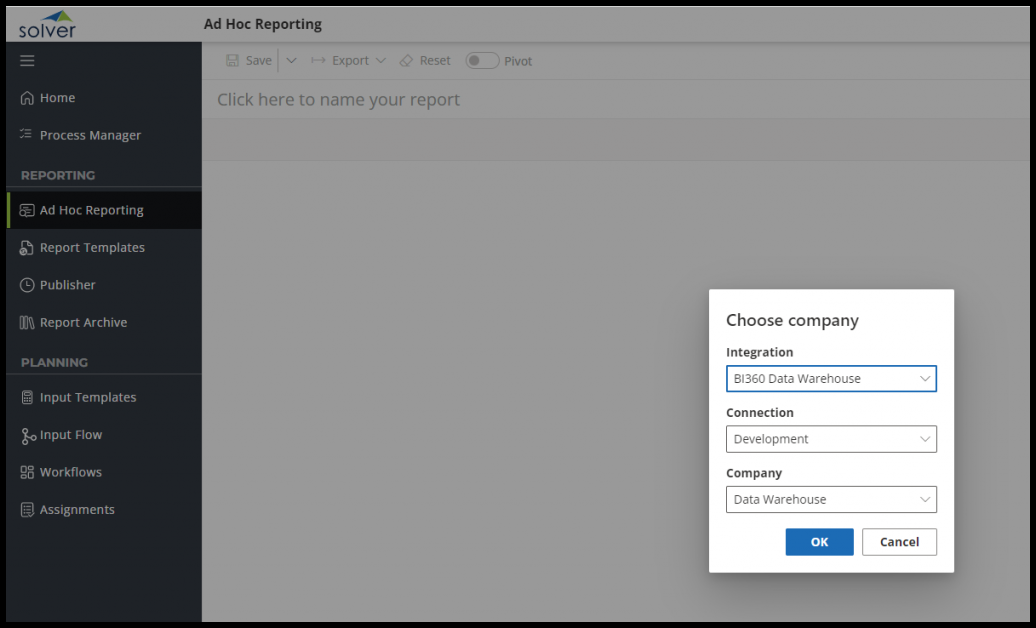
- Click OK
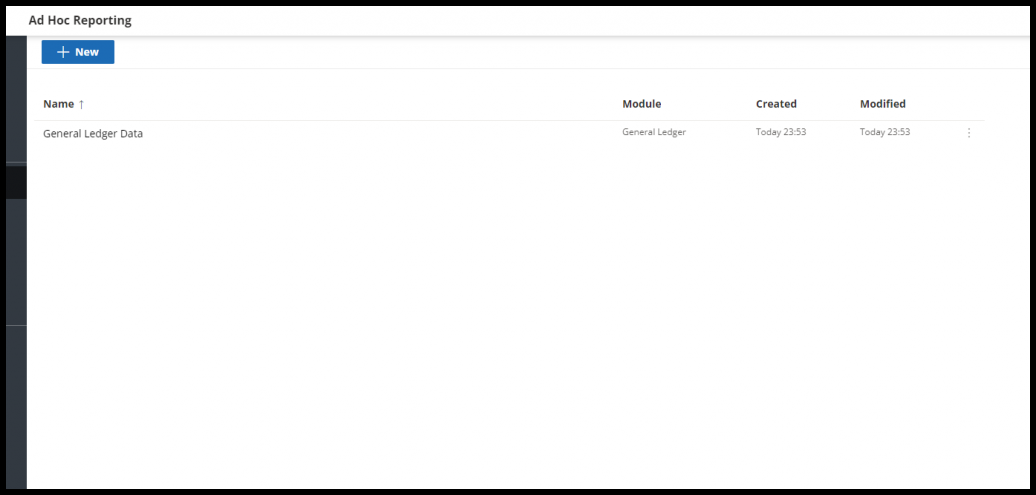
- If you have saved any Ad Hoc reports, upon clicking Ad Hoc Reporting, a listing of all previously saved reports will appear.
- The grid on the far right displays the fact sets for the currently selected module.
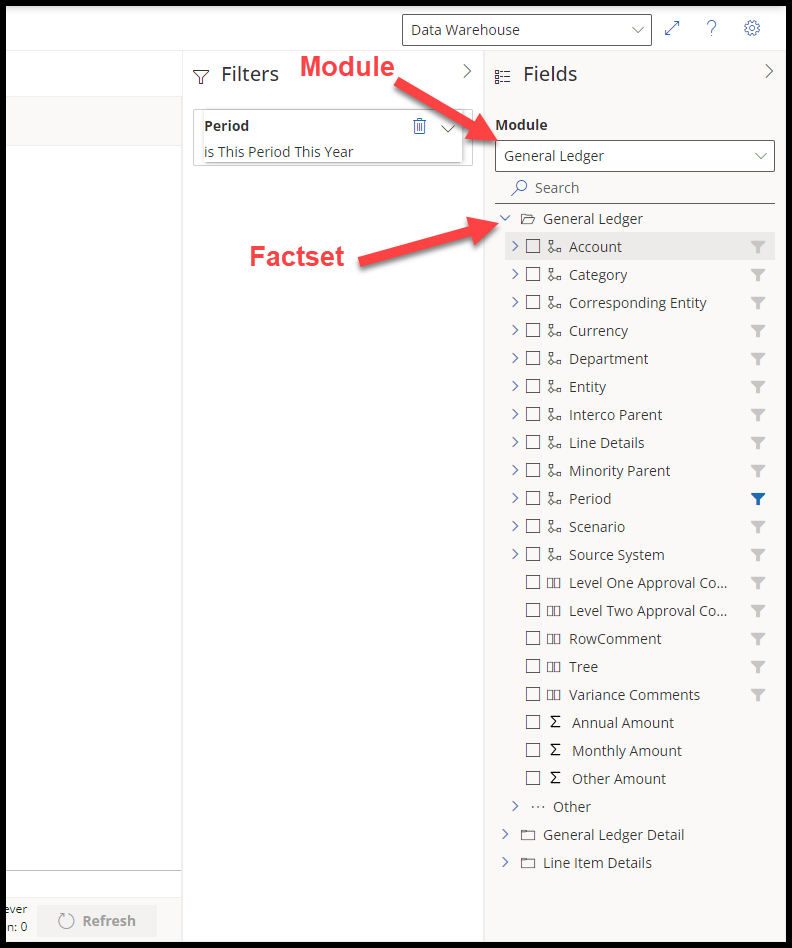
- The grid on the far right displays the fact sets for the currently selected module.
- Period is a filter by default. Reference the blue filter icon. A default filter for “This period this year” has been applied and can be seen in the middle grid
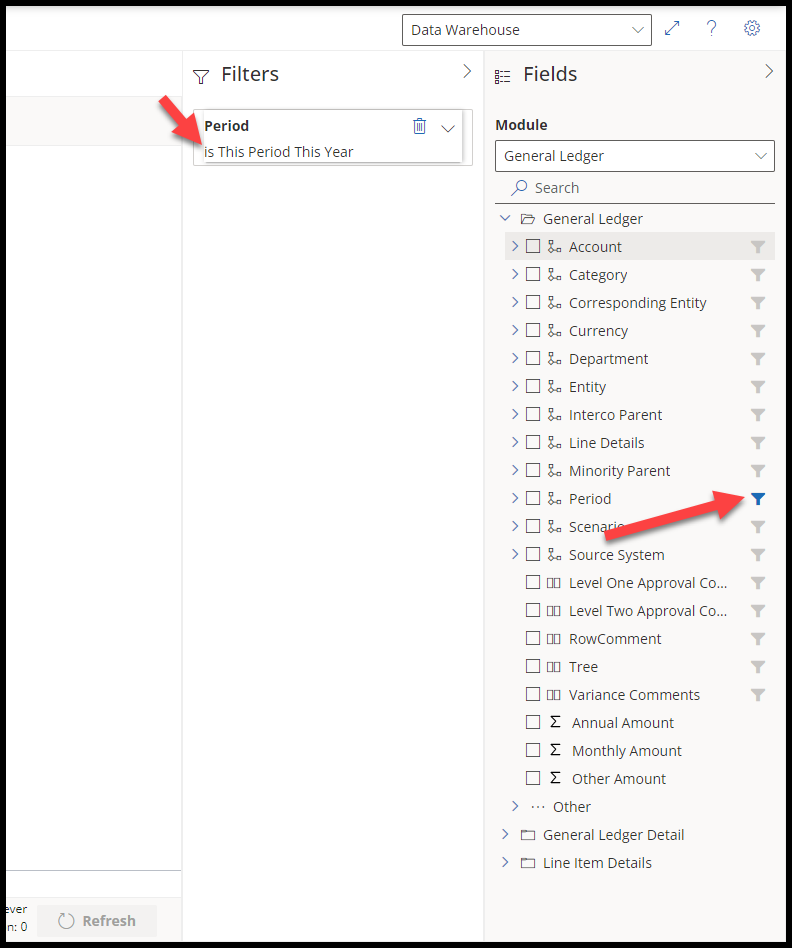
- Period is a filter by default. Reference the blue filter icon. A default filter for “This period this year” has been applied and can be seen in the middle grid
- Expand on the fact set to display the dimensions you would like to bring into the report.
- Period is not a column that will appear in your Ad Hoc report because the checkbox is not selected. Check the checkbox to make Period appear in your report.
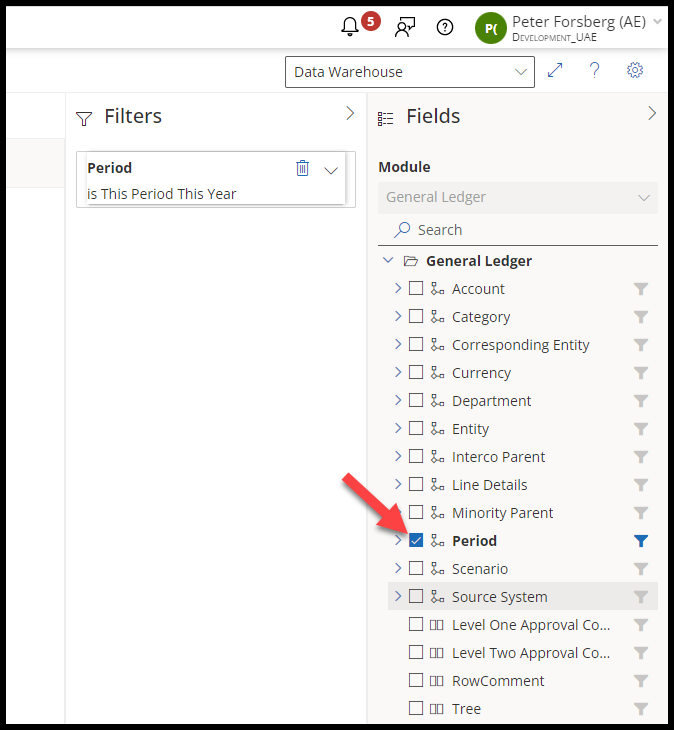
- Click the checkboxes for other dimensions and attributes you would like to see in your report. Click the filter icon to make it a filterable value.
- Once all fields are selected, click Refresh in the bottom right-hand corner of the data grid.
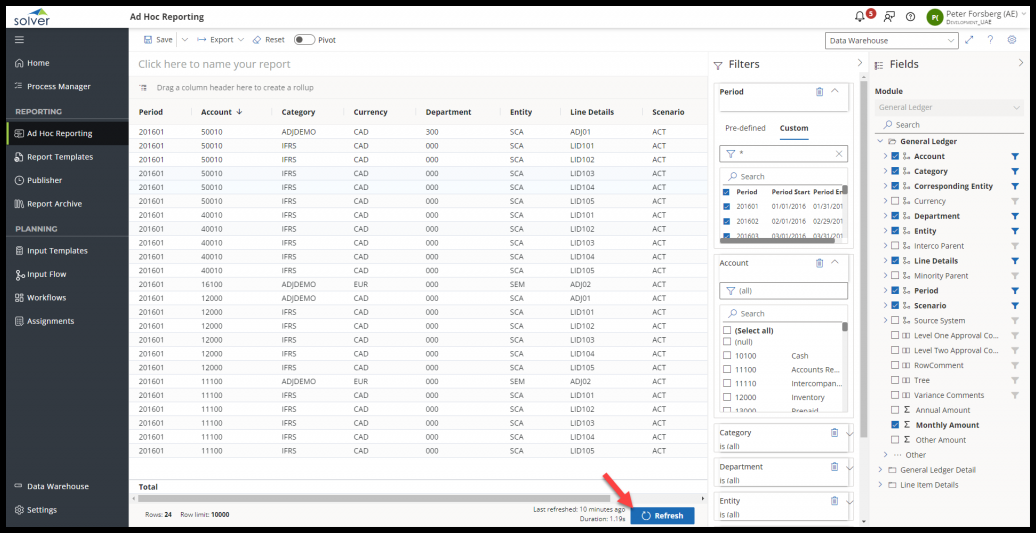
- The refresh button becomes active (blue) when changes are made to the selected fields and/or filters. If it is greyed out, no changes have been made.
- If the data does not load or is not what you expect, check your filters and ensure the correct ones are applied.
Click Save in the upper left-hand corner, and you have successfully created your first Ad Hoc Report
Ad Hoc Home Screen
Sharing an Ad Hoc Report
By default, an Ad Hoc Report is available to just the creator. Ad Hoc Reporting support sharing an Ad Hoc report with all other users of your tenant. To share an Ad Hoc Report.
- Navigate to Ad Hoc
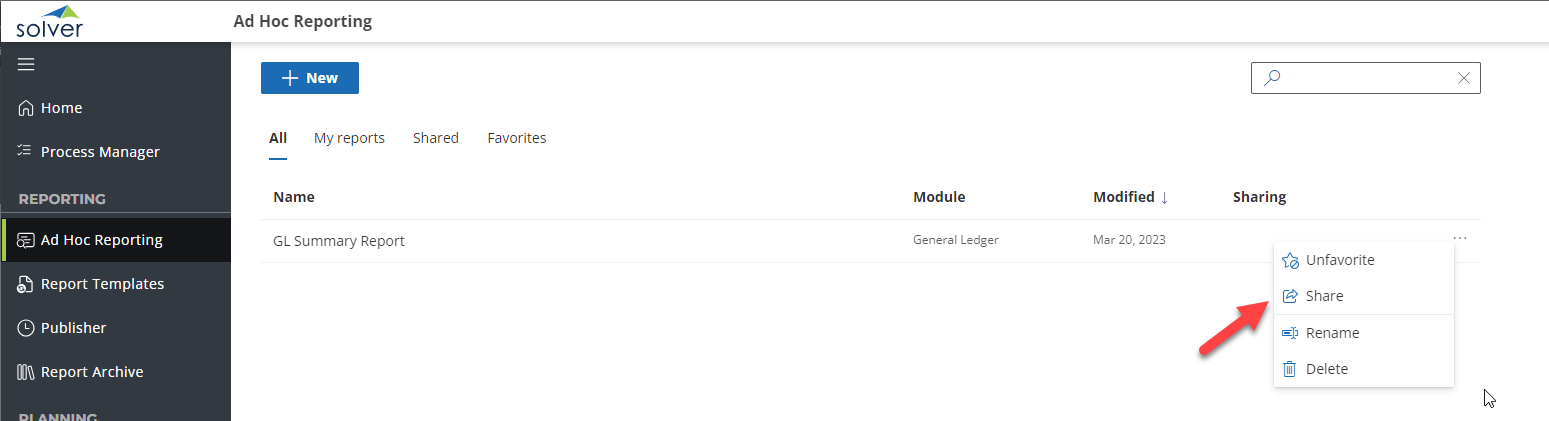
- To the far right of the report you’d like to share, click the ellipsis and choose Share
Unsharing an Ad Hoc Report
The owner of an Ad Hoc report can choose to unshare their Ad Hoc Report.
- Navigate to Ad Hoc
- To the far right of the report you’d like to unshare, click the ellipsis and choose Unshare
Renaming an Ad Hoc Report
The owner of an Ad Hoc report can rename their Ad Hoc report. After the name change, the new name will appear to all end users. To rename an Ad Hoc Report
- Navigate to Ad Hoc Reporting.
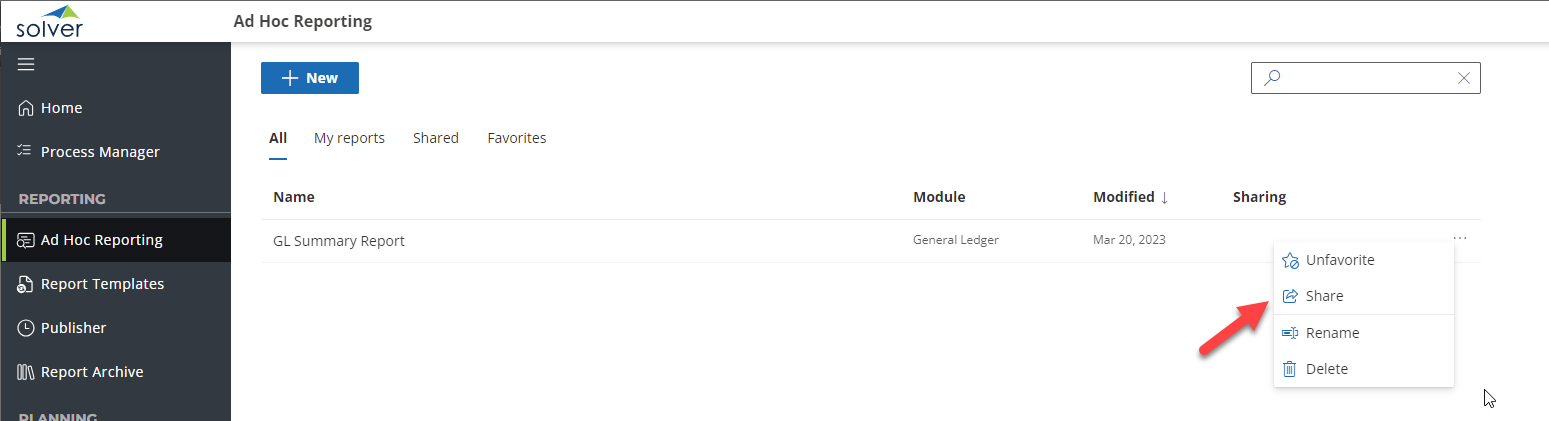
- To the far right of the report you’d like to rename, click the ellipsis and choose Rename.
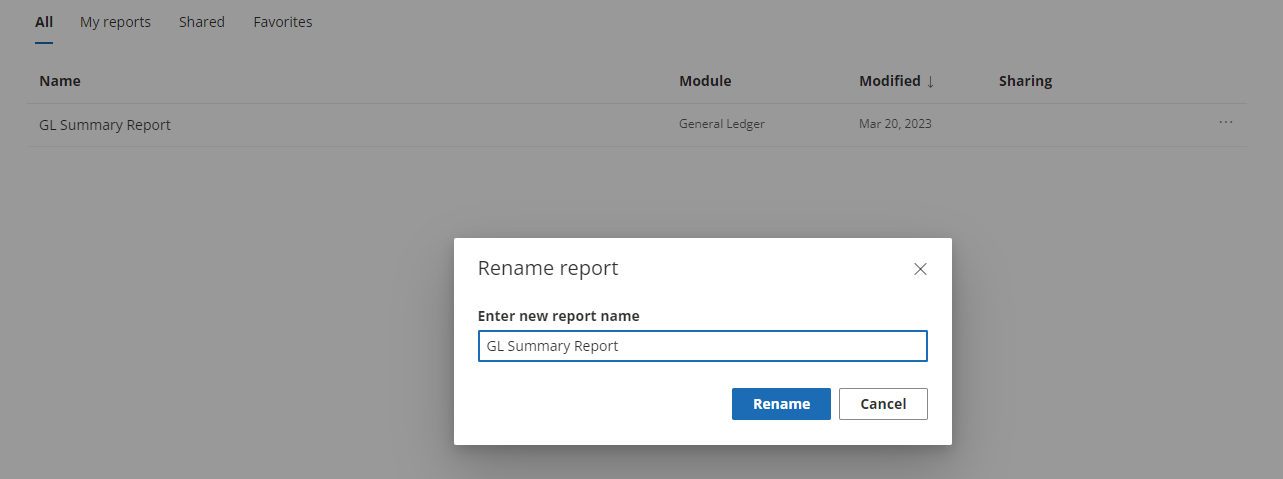
- In the popup that appears, type in the new name and click Rename to save your work.
Deleting and an Ad Hoc Report
Deleting an Ad Hoc report removes the report from the application. Additionally, if this report is shared amongst the users of the tenant, they will no longer see the report once it is deleted.
Deleting an Ad Hoc Report cannot be undone, and the report cannot be recovered.
To delete an Ad Hoc Report
- Navigate to Ad Hoc Reporting.
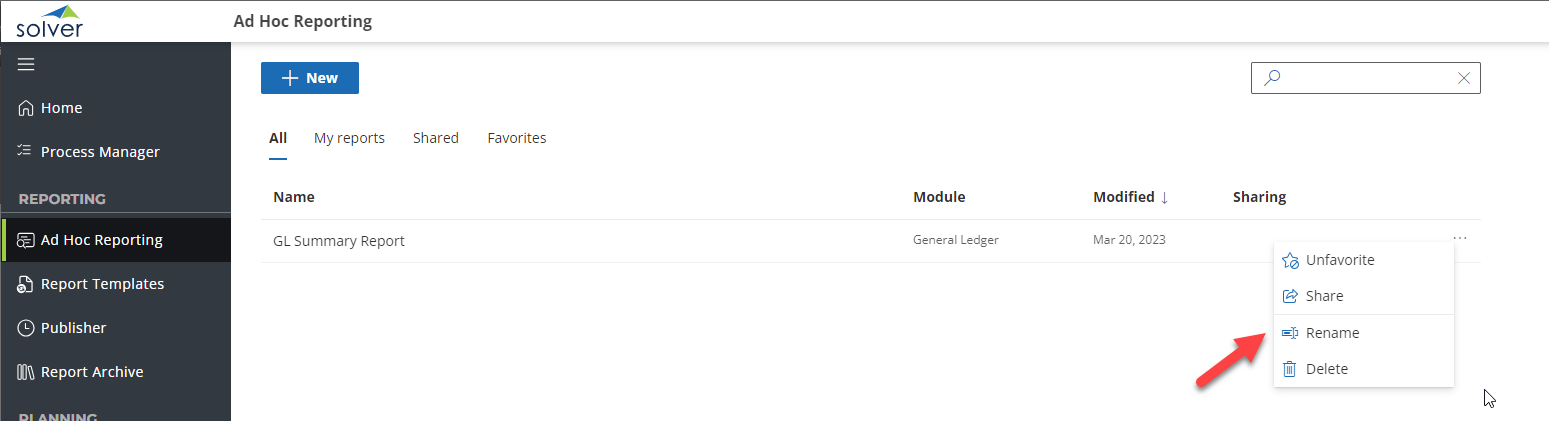
- To the far right of the report you’d like to delete, click the ellipsis and choose Delete.
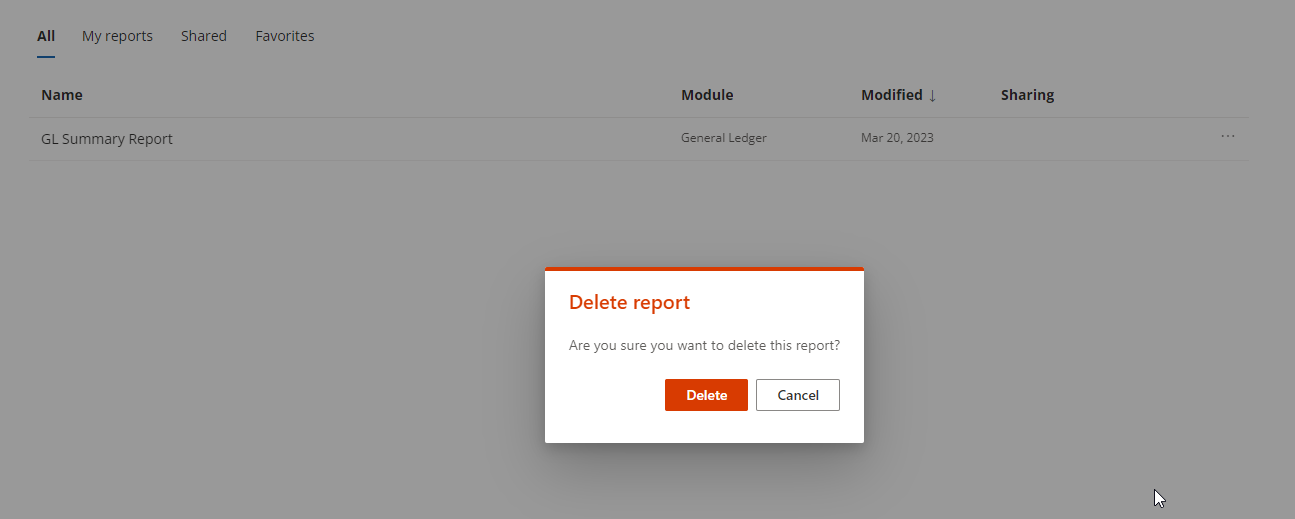
- A popup modal will appear confirming deletion and removal of this report from your tenant.
Ad Hoc Restrictions and Need to Knows
Ad Hoc Reporting has the following restrictions and limitations at this time
- Export and import Ad Hoc saved reports as a “template”.
- Export the Saved, Ad Hoc Report to be used as the start of a Report Designer template.
- A single Ad Hoc report can query only one module
- Filtering and module attributes can significantly increase the time it takes to render your report.