Solver’s QuickBooks Online (QBO) Connector is a robust connector enabling users to pull General Ledger Detail and Inventory data from your sandbox or production QuickBooks Online environments into Solver. Solver’s connector:
- Utilizes OAuth2 for secure authentication to your QuickBooks environment
- QuickBooks requires that the account being used to authenticate is a Master Admin or Company Admin user in QuickBooks. This user has full permissions in your QuickBooks Online environment, including write capabilities. However, Solver’s Connector does not write or update any data in your QuickBooks company.
- QuickBooks Online only allows for one “admin” or “master admin” account to create a connection to Solver; referred to as an “App” in QuickBooks. Therefore, the credentials used to create the first integration between QuickBooks and Solver must be used for all integrations once a connection is established to your QuickBooks system in Solver. Please review the next section on best practices for setting up your first connection.
- The language of this master account must be set to English.
- Connects to the QuickBooks Reports API with support for the following, default fields of the below data:
- Account
- Customer
- Department
- Employee
- Vendor
- Tax Agency
- Tax Code
- Tax Rate
- Currency
- General Ledger Cash
- General Ledger Accrual
- Inventory Assets
- QuickBooks Online is not supported on Solver Private Host.
Unsupported Features
Microsoft Internet Explorer
When connecting Solver to your QuickBooks account, you must “give consent” as part of the OAuth 2.0 process. To do so, a popup will appear, this popup is only supported in Mozilla Firefox, Google Chrome and Microsoft Edge; Microsoft Internet Explorer (IE) is not supported. Therefore, creating an integration in Solver to QuickBooks is not supported in IE.
QuickBooks Online Configuration
Connecting Solver to QuickBooks is simple and easy. To connect the two, an admin or master admin account must be used. To begin:
- Log into your QuickBooks Online account as an Admin user.
- Click on the cog icon in the upper right-hand corner and click Manage Users.
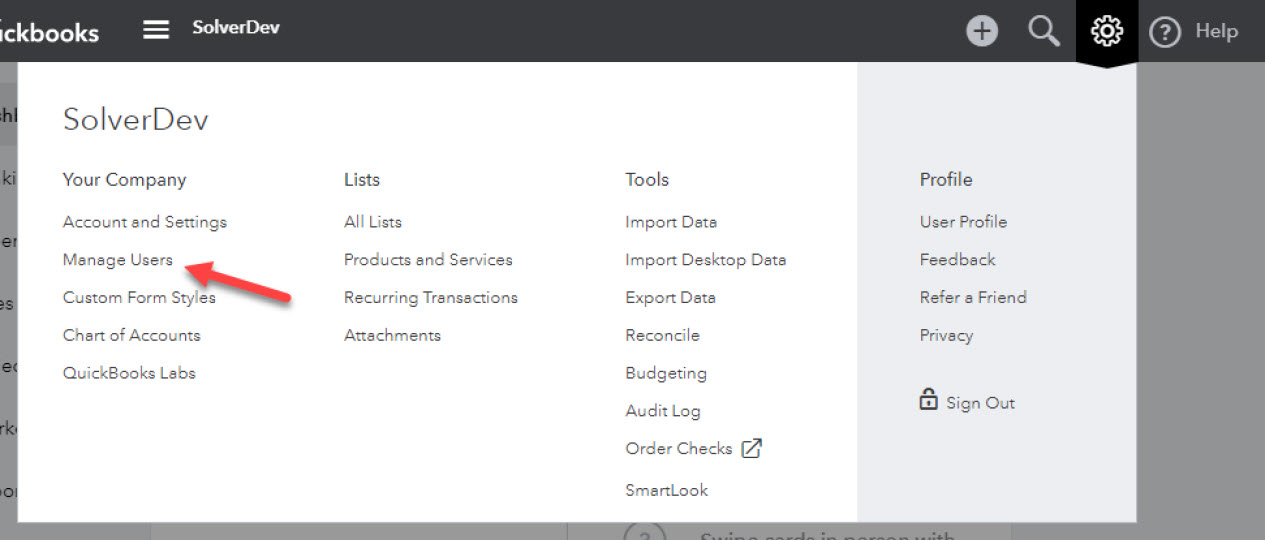
- Your users list will appear.
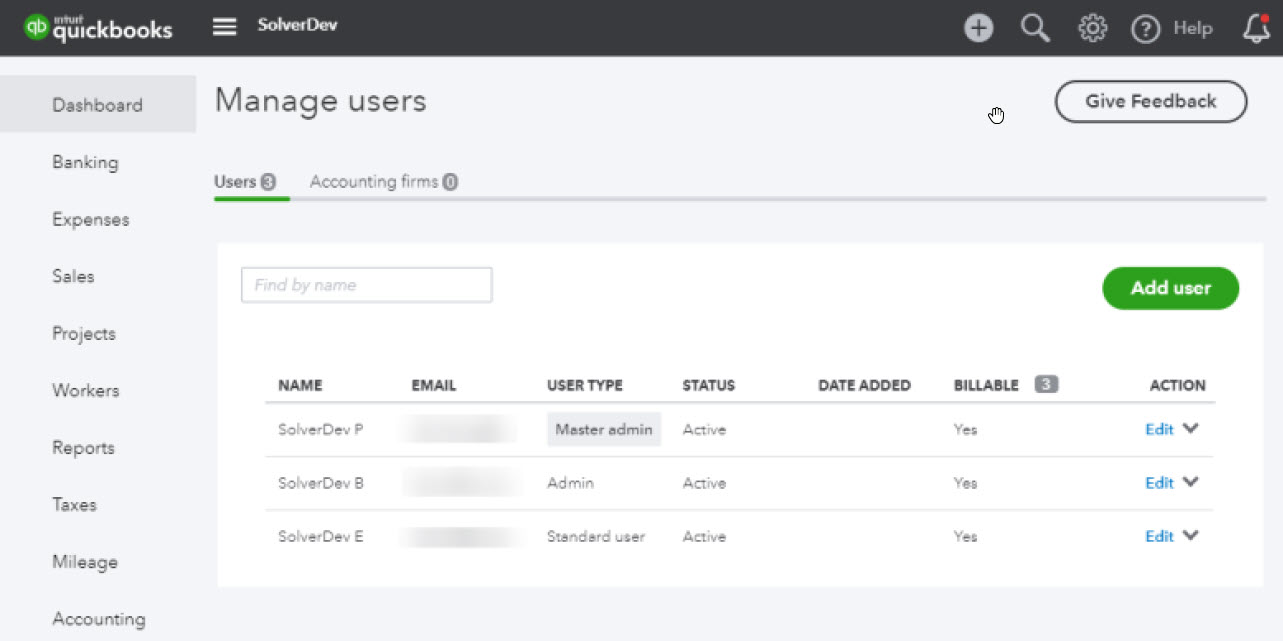
In the above screenshot, three users are shown. Only SolverDev P and SolverDev B can log in to QuickBooks from the Solver Cloud QuickBooks connector. In other word, only users with User Types of either “admin” or “master admin” can connect QuickBooks to Solver.
- You can choose to create an account to be used in Solver by following these instructions provided by QuickBooks.
This completes the configuration required from within QuickBooks.
Connecting Solver to QuickBooks
Previously, a user was identified or created in QuickBooks that will be used in Solver. In this section we will go over connecting Solver to your QuickBooks account.
To Begin:
- Log into your Solver Cloud tenant.
| As noted earlier, Microsoft Internet Explorer is unsupported by QuickBooks. |
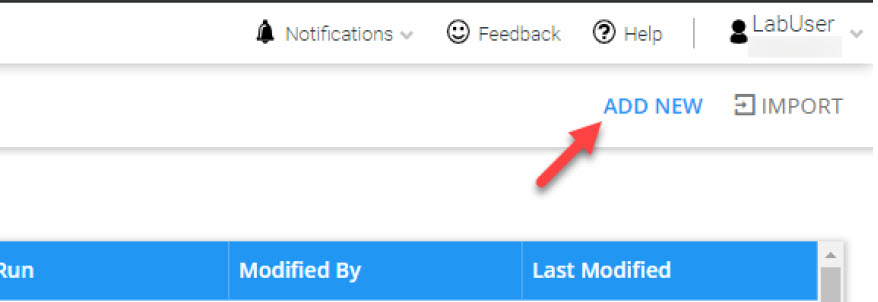
- Navigate to Data Warehouse -> Data -> Integrations and click Add New in the upper right-hand corner.
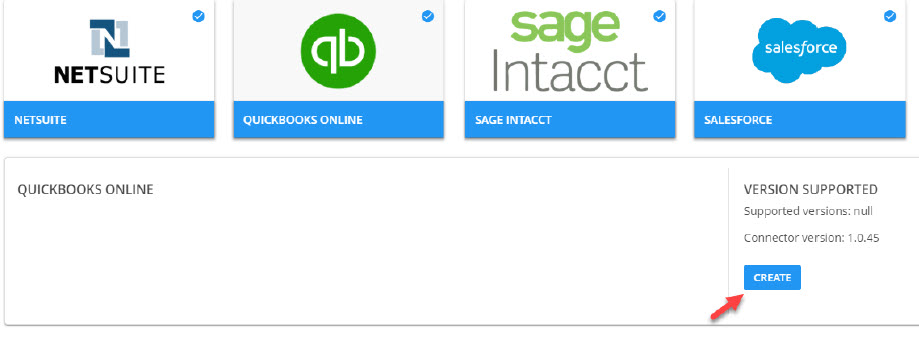
- The Solver Connector Marketplace will appear, scroll to and click on the QuickBooks Online tile. The tile will expand and select Create.
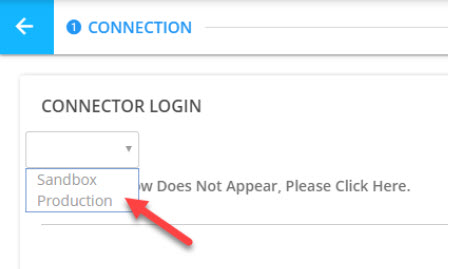
- The first page of the QuickBooks connector will load. In the dropdown, select whether to connect to your QuickBooks Sandbox or Production Environment.
- Upon selecting an option, a popup will appear prompting you to log in with your QuickBooks credentials. Type them in and click Sign In.
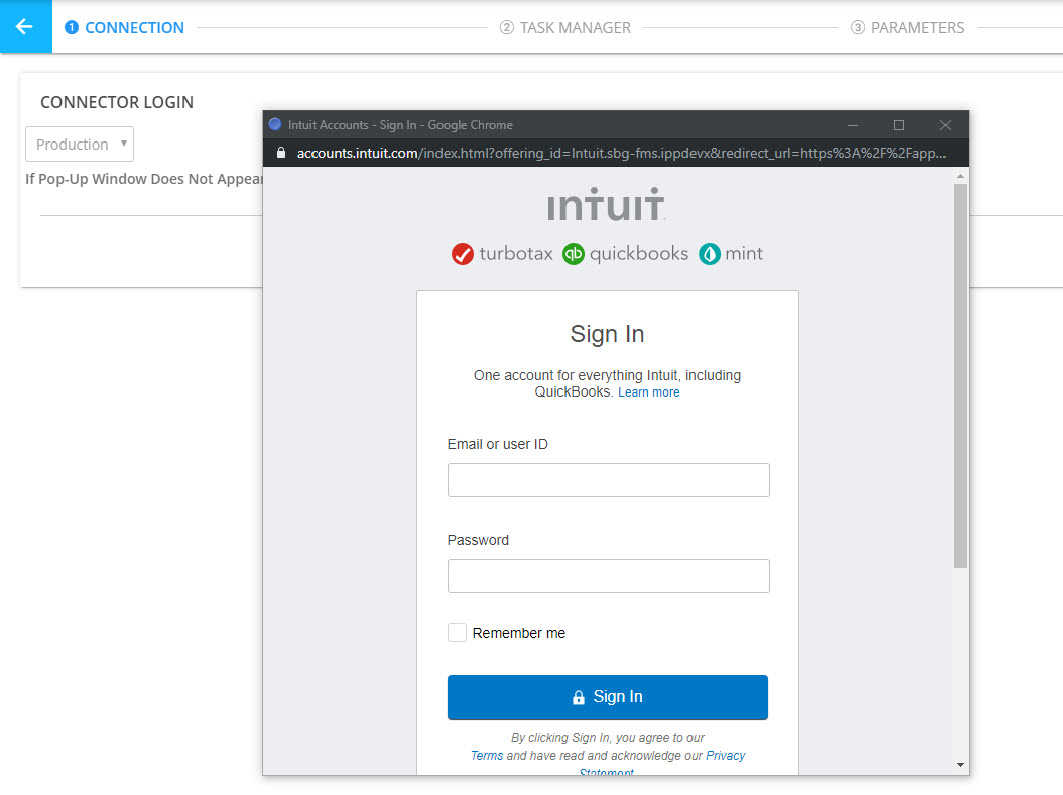
 | These credentials must be used for all integrations being created. Different credentials cannot be used in your tenant. The credentials provided must be of an Admin or Master Admin user. |
If you have multi-factor authentication (MFA) turned on, you will see a popup prompting you to select where to send the MFA code to, choose from one of the options available and type in the code that QuickBooks sends you.
- If you have multiple companies, a second popup will appear prompting you to select a company. Choose your company and click connect.
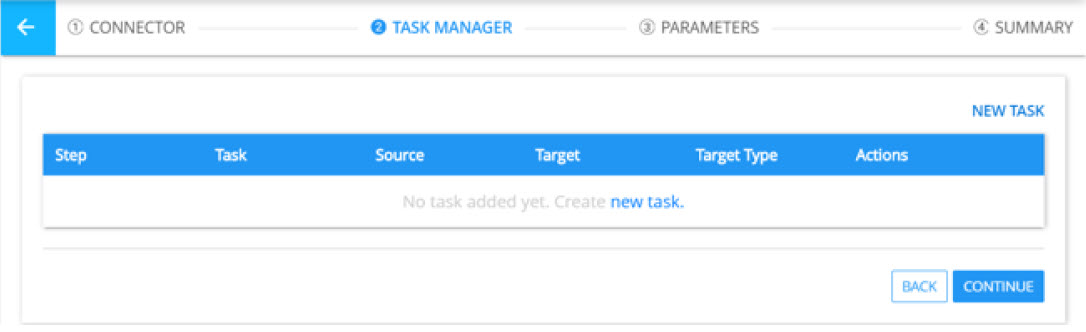
- After clicking connect, the credentials will be authenticated. Assuming that the credentials are valid, the Task Manager tab will load and you can build your first integration task. Click on new task to begin this process.
This completes the connection process. This user guide does not detail how to build an integration. Please visit the support site for more information on this process.