Overview:
This article details the general setup and configuration of Solver’s robust connector to the SAP Business One HANA system. Beginning with version 9.30 PL09, SAP Business One for SAP HANA supports access to built-in system and custom views through Service Layer – the OData communication channel to access SAP Business One data. This SAP feature set is called Semantic Layer.
Article Sections:
- More Information
- Properties
- Known Issues
More Information:
Solver has built custom views that facilitate the process of extracting and loading SAP B1 data into Solver Cloud and Version 5.0. These custom views can be installed in either on-premise installations of SAP Business One version for HANA or in Cloud hosted environments, both private and public cloud providers. To summarize, these are the minimum versions required:
- SAP Business One 9.30 PL09 version for SAP HANA
- Solver Cloud or Solver Private Host version 5.0
Customers access the service through the following url:
https://<service layer server>:50000/b1s/v1/sml.svc
where <service layer server> is the ip address or host name of the server where the service layer is installed.
General Setup and Configuration
- The company database must first be initialized to enable the SAP B1 analytics services including Service Layer.
- Once enabled, the built-in system views can be selected for exposure through the web service. Custom views are developed in the SAP HANA Studio development environment.
- After which, the custom views are exported in xml format. This xml file is then imported using the Business One front-end client.
- Use this same process to deploy Solver’s custom views. The necessary steps are detailed in the sections that follow.
Enabling Semantic Layer
To use Semantic Layer, the SAP Business One Analytics Service must be installed and enabled. Rerun the installation of SAP B1 if this feature set was not selected at install.
With Analytics installed, open a browser and navigate to:
https://<hanaserver>:40000/Enablement
- Go to Companies, select the company, and click Initialize. This process may take a few minutes.
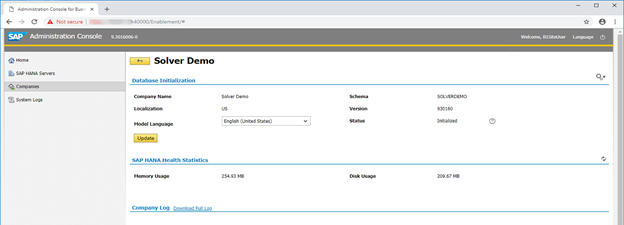
- Once complete, restart the SAP Business One client.
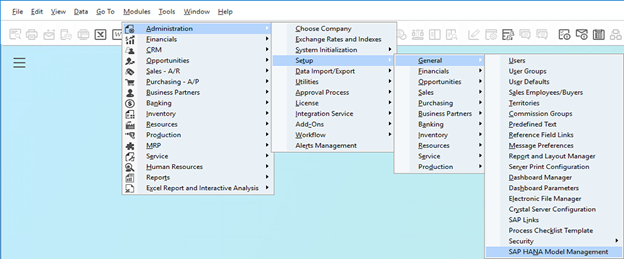
- Navigate to the new menu option at Administration > Setup > General > SAP HANA Model Management.
- System views can be exposed through Service Layer if the ‘Expose Service Layer’ checkbox is available. As of this writing, the system views have not been explored by Solver for potential use with Solver. In this window, custom views can also be imported and deployed. This will be covered in the next section.

- Click ‘Update’ and restart Service Layer in Linux.
- Here is the default location of the command in the Linux file system: /etc/init.d/b1s restart
The SAP analytics features should now be enabled.
Importing and deploying Custom Views
Custom views are developed in HANA Studio. There are three main types:
- Attribute views
- Analytic views
- Calculation views
Of the three, only Calculation views can be enabled in Semantic Layer. The development of custom views is beyond the scope of this document. See the relevant SAP HANA development documentation available from SAP.
Custom views are exported from SAP HANA Studio in xml format. They retain the original schema in which they were developed. The views will need to be ’Packaged’ to replace the schema with ’%PLACEHOLDER%’ before they can be imported. While this can be performed manually, there is a utility available from SAP called the ”Content Package Tool” which automates this process. Once the views are ”Packaged” they can be imported from the SAP HANA Model Management screen.
- Select Import, follow the instructions in the wizard, then Deploy.
- After deploying, check each box to expose the views in Semantic Layer.
Custom SAP HANA views are typically developed in a non-production environment. Export the views to move them into production. Begin this process from the SAP HANA Modeler perspective in SAP HANA Studio.
Exporting Custom Views
- In the upper right hand corner select the icon as shown.

- In the quick view tab choose Export.
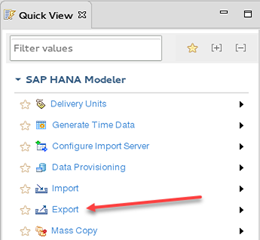
- Scroll to the SAP HANA Content folder and select Developer Mode.
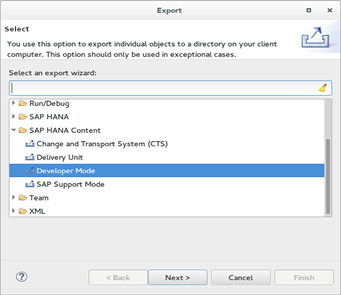
- Continue through each step to finish the export wizard.
The resulting folder can then be moved or copied to the environment where the SAP Business One front-end client is installed.
Package, Import, and Deploy
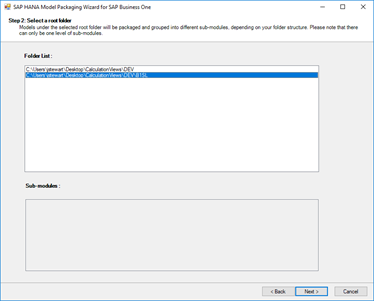
- Begin by launching the SAP HANA Model Package Too for SAP Business One.

- Choose the appropriate folder level. In this example, the entire package ’B1SL’ is selected in order to group all the views together as one package.
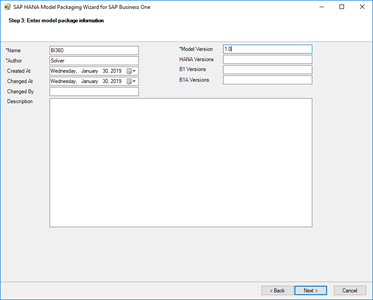
- Complete all required fields.
- Check the ’Enable for Service Layer’ box for each view.
Note: SAP allows for up to ten segments in the account string. There is no need to enable segments that do not exist. SolverNaturalAccount is Segment0. For a four segment account string enable up to SolverSegment3.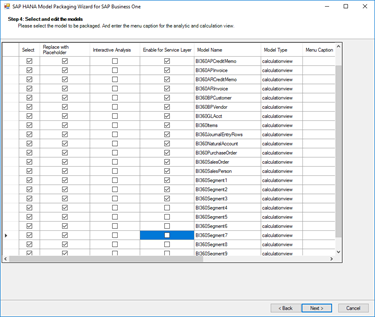
- Choose an output folder.
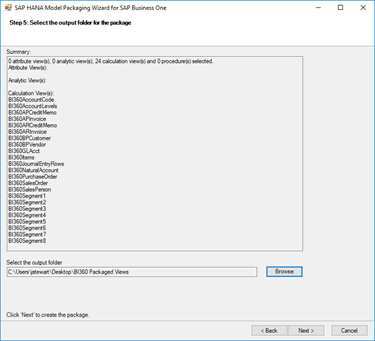
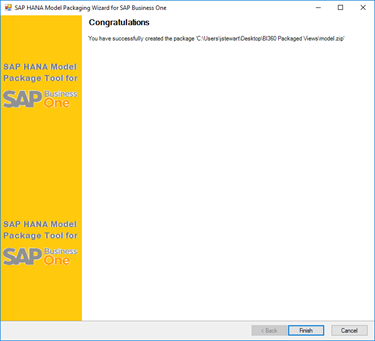
- Click Finish to complete the package tool wizard.
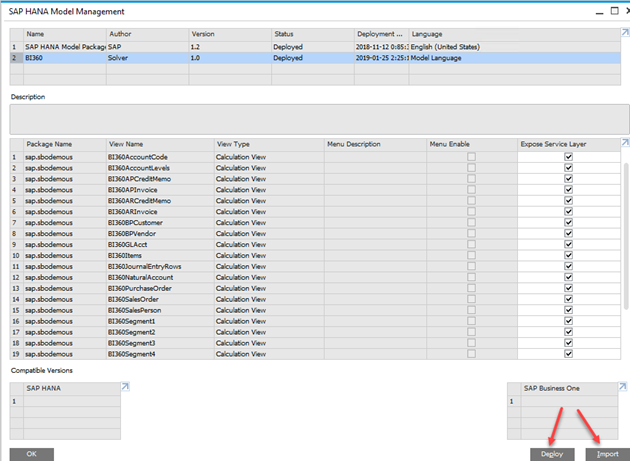
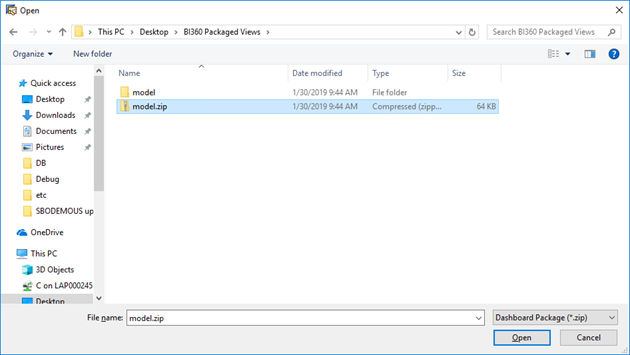
- Open the SAP HANA Model Management screen and click Import.

- Navigate to the saved packaged view folder and select the model.zip file.
- This message can be disregarded by clicking OK.

- Highlight the imported package in the upper pane and check the Expose Service Layer checkbox for each view.
- SolverAccountCode can be left unchecked to avoid confusion as it is merely a component of SolverGLAcct, the view for the account string dimension.
- Then click Deploy.
- The Status field in the upper pane will change from Imported to Deploying, then to Deployed.
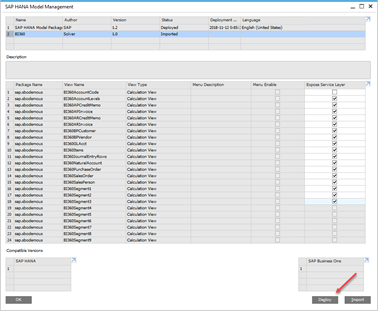
- The Status field in the upper pane will change from Imported to Deploying, then to Deployed.
Known issues
For those experiencing any issues with duplicate or missing data related to their Business One jobs see this article.