This article details how to transfer ownership of items from one user to another, how to remove a user, and how to transfer items after a user has already been removed.
The following items can be transferred:
- Workflows
- Publisher Jobs
- Data Connections
- Input Flows
- Input Templates
- Archive Items
- Report Templates
No other items can be transferred to another user using this method.
Note: To transfer ownership of items from one user to another and/or remove a user from the cloud tenant, you must have the system permission “Can manage users, licenses, and data access”.
Transfer Ownership of Items
Before deleting a user from the tenant, it is best to first transfer any items they own to an active user. To do this, follow these steps:
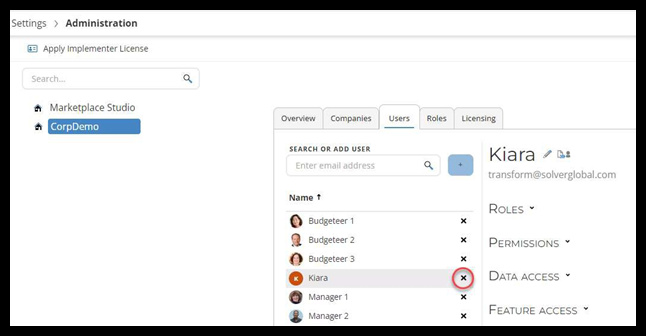
- Log in to your cloud environment and, in the lower-left corner of your tenant, navigate to Settings > Administration and select the tenant you wish to transfer a user’s ownership from.
- To the right of the highlighted tenant, click on the Users tab to view a list of current users in your tenant.
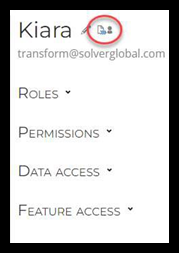
- Select the user from whom you wish to transfer items.
- Click the Transfer Ownership of Items icon to the right of their name.
- In the upper right-hand corner of the Transfer Ownership of Items pop-up window, locate the dropdown box to select the user to whom you wish to transfer the items. You can type directly into the box to search for a user or click the dropdown icon to view the full list of available users.
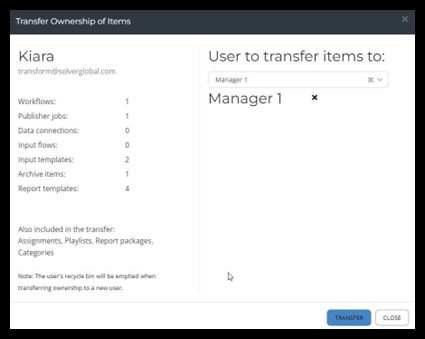
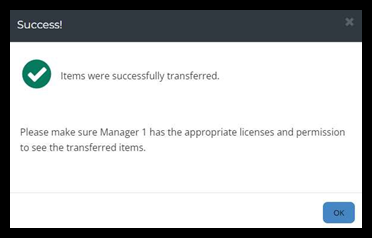
NOTE: If the user selected does not have any items to transfer, there will be no dropdown in the upper right-hand corner of the pop-up window, just a note saying, “There are no items to transfer.” - Select the user to transfer ownership of items to and then click the Transfer button to complete the transaction. The following successfully completed message should appear.
Remove User from Cloud Tenant
- In your cloud environment, navigate to Settings > Administration and select the tenant from which you want to remove a user.
- To the right of the highlighted tenant, click on the Users tab to view a list of current users in your tenant. Find the user you want to remove.
- Click the X to the right of the user’s name to remove the user.
- Confirm the removal of the user from the tenant by clicking the Remove button.
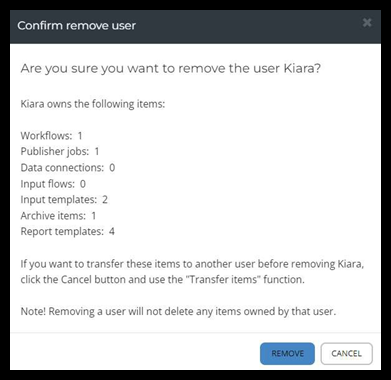
NOTE: Removing a user will not delete any items, categories, or shares owned by that user. If the ownership of the items is not transferred to an active user before the removal of the user from the tenant, you will need to perform the steps outlined in the next section.
Transfer Ownership of Items of a Previously Removed User
- In your cloud environment, navigate to Settings > Administration and select the tenant from which you want to transfer items.
- To the right of the highlighted tenant, click on the Users tab and locate the search or add user box.
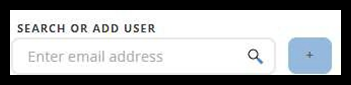
- Enter the email address of the previously removed user.
- Click the + button to add a user.
- You can now perform the steps outlined in the Transfer of Ownership section.
- After the items are transferred, you may remove the user again by following the steps in the Remove User from Cloud Tenant section.