This article will detail enabling and configuring Okta Authentication within Solver. There are two steps:
- Enabling Okta in Solver.
- You must be a Solver Customer admin in order to do this step.
- Creating and configuring an application in your Okta tenant.
- you must be an Okta admin to create an application.
Enable Okta in Solver
This section will detail two steps necessary to get Okta authentication working in Solver.
- Create an app in okta
- Setup an API Authorization Server Policy
To enable Okta in Solver, as a customer admin
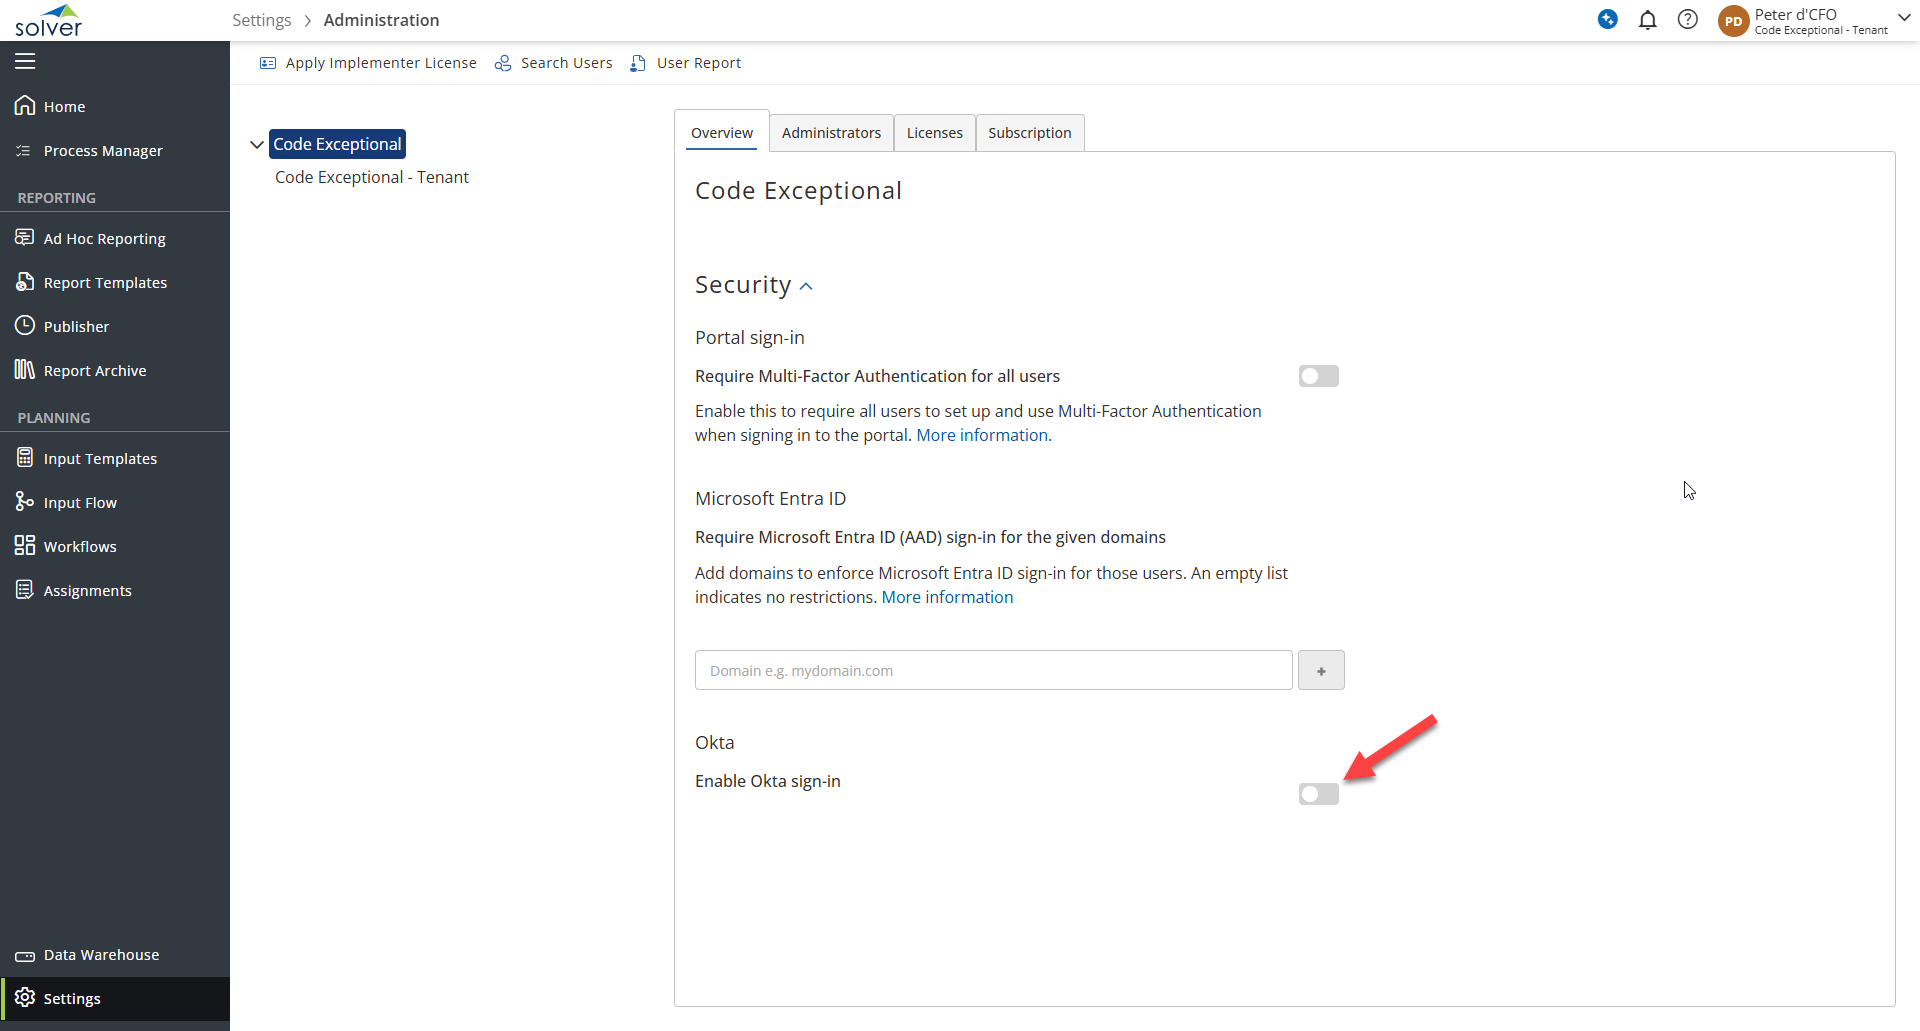
- Navigate to Settings > Administration.
- Under Overview, enabled Okta.
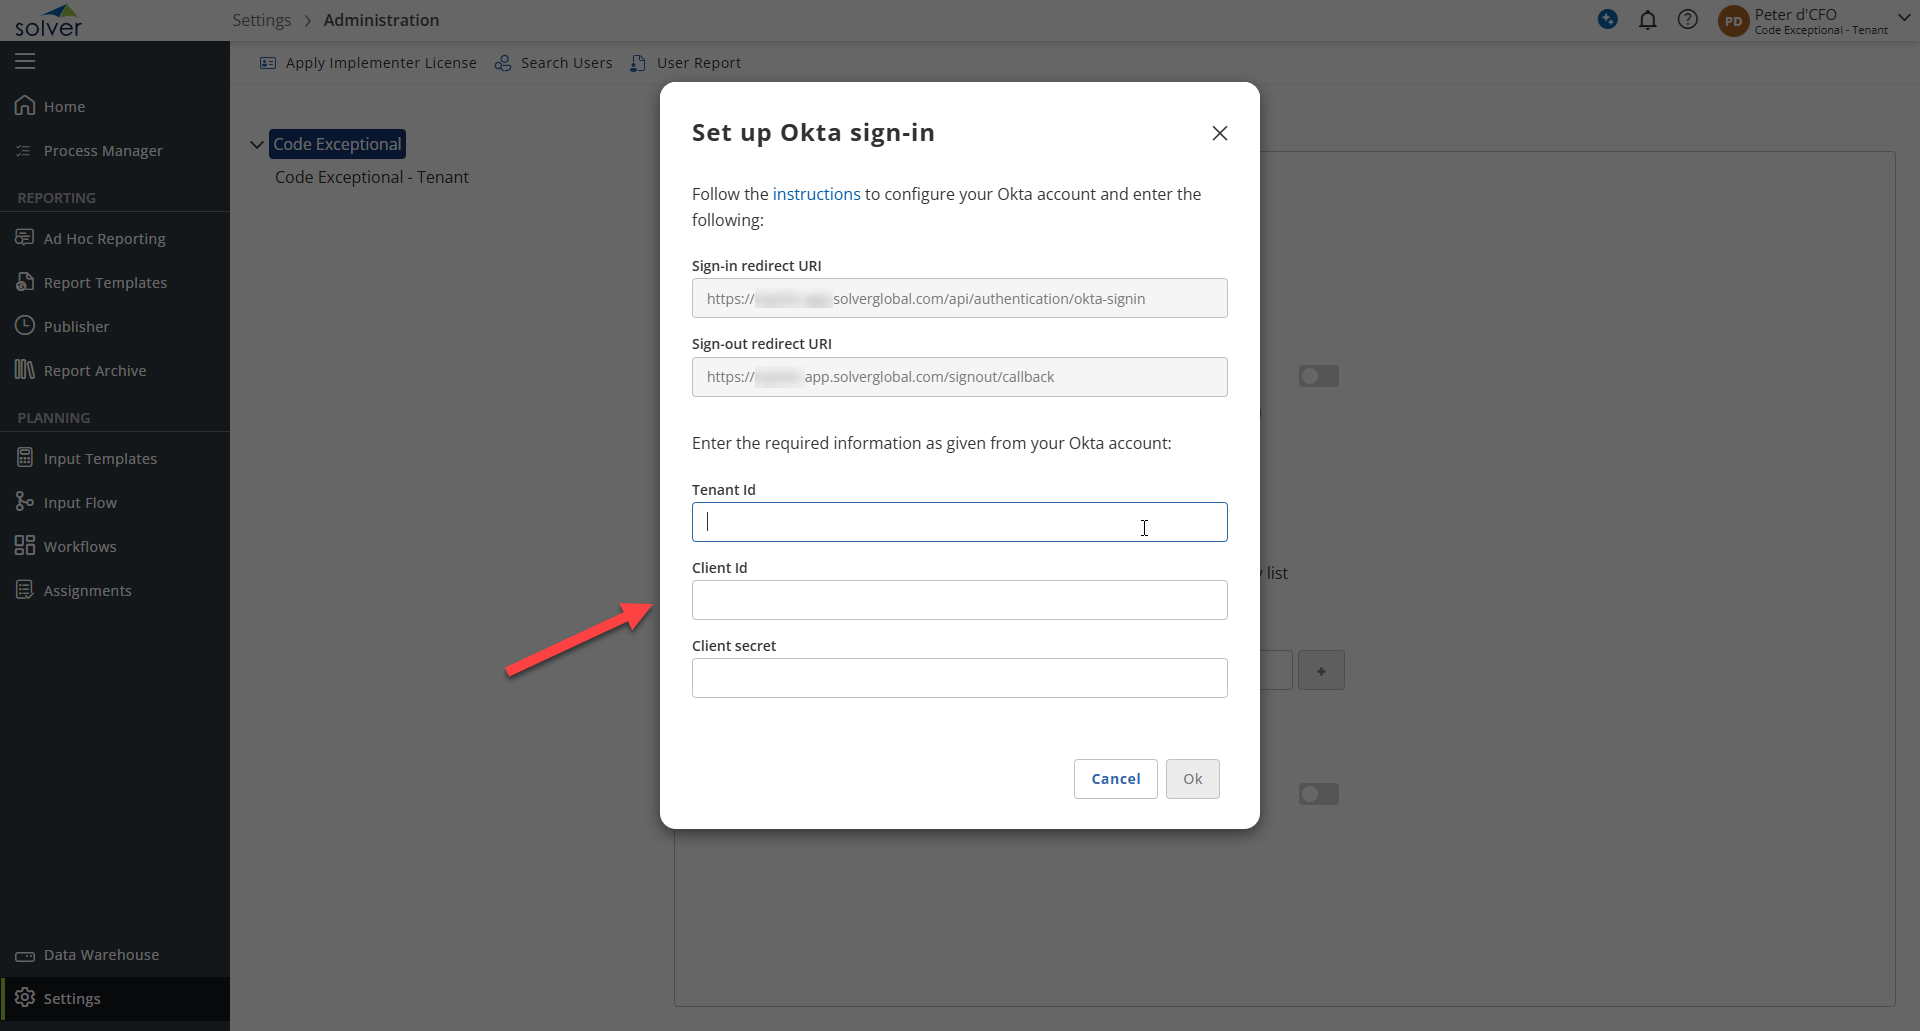
- A popup will appear, asking you for your Authority Server (optional), Okta tenant Id, client Id and Client secret. Additionally, there are two redirect URIs that you will need to provide on the Okta configuration in the next section.
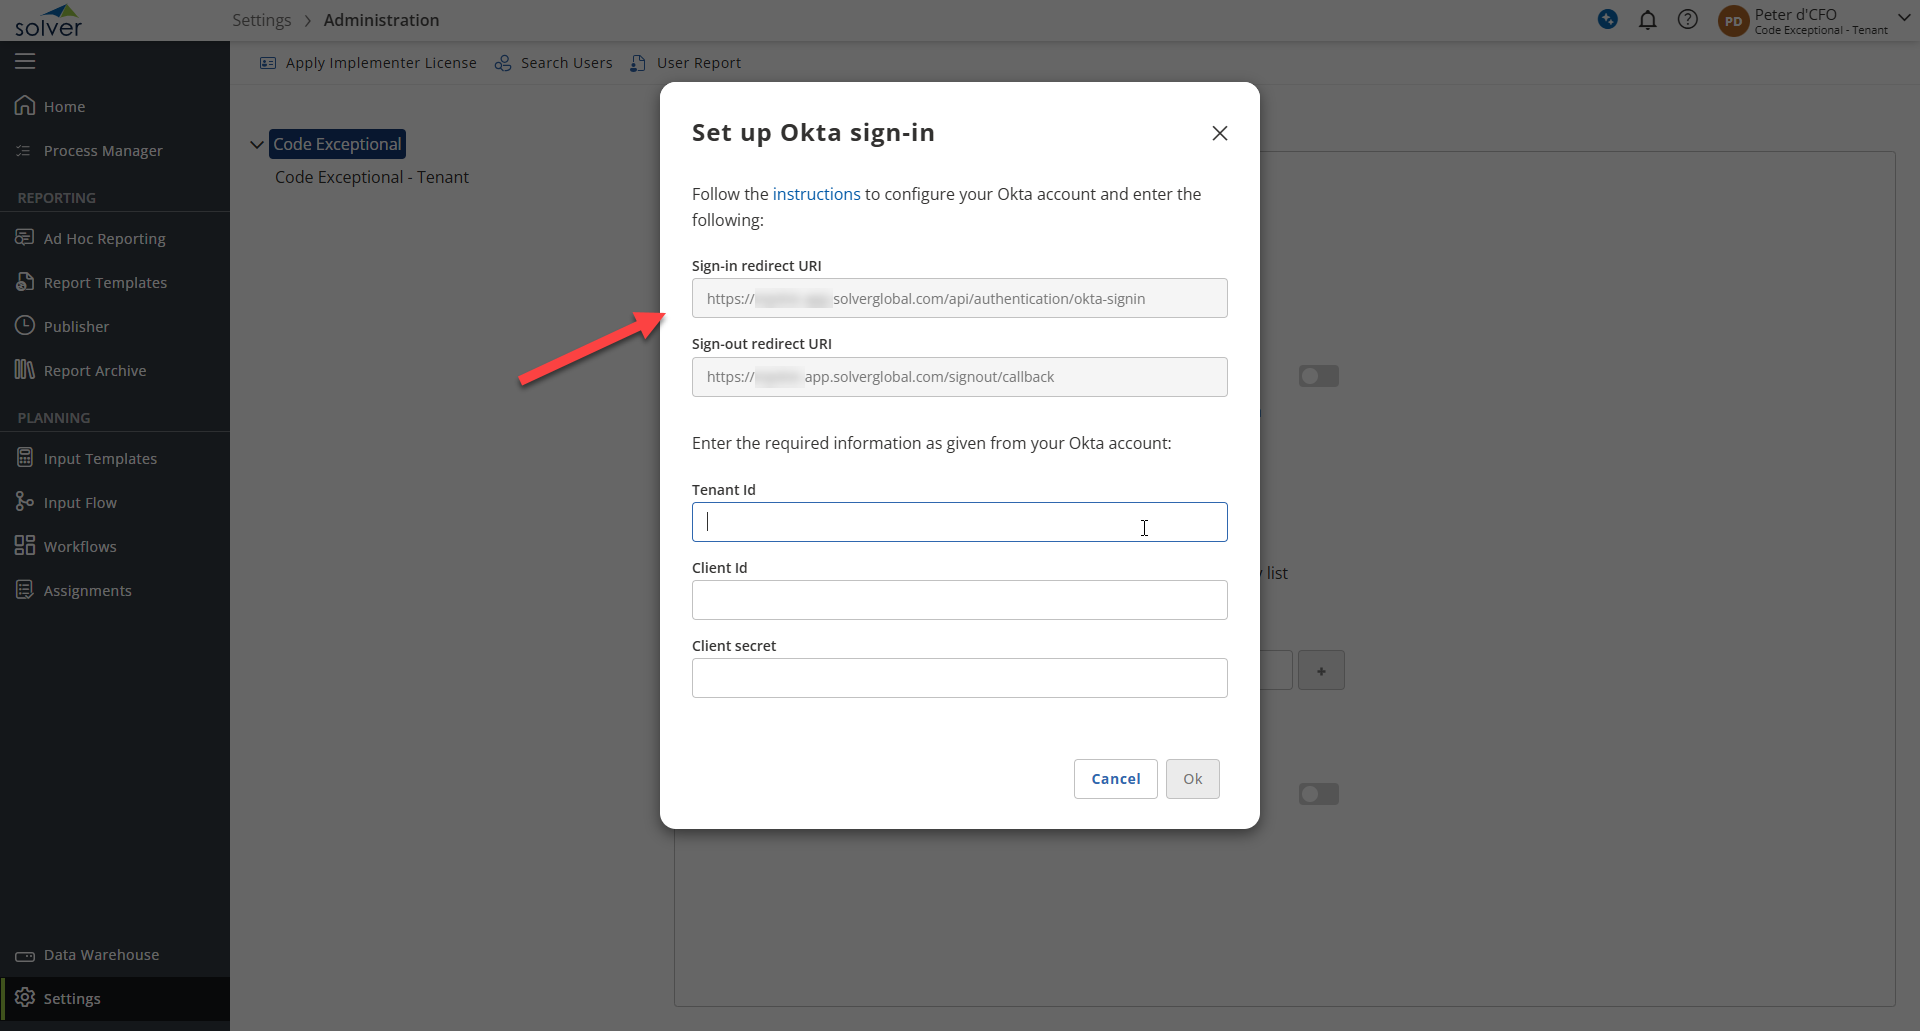
Your URIs may be different from the ones shown in the above screenshot and may look like
Sign-in redirect URI
- https://{URL}/api/authentication/dynamicopenidconnect-signin
Sign-out redirect URI
- https://{url}/sign-in
These URIs are expected and can be used in your Okta app. You now need to proceed to your Okta administration with the above mentioned URIs.
Creating and App and Configuration
Opening a new tab in your web browser:
- Navigate to your Okta URL and log in as an admin
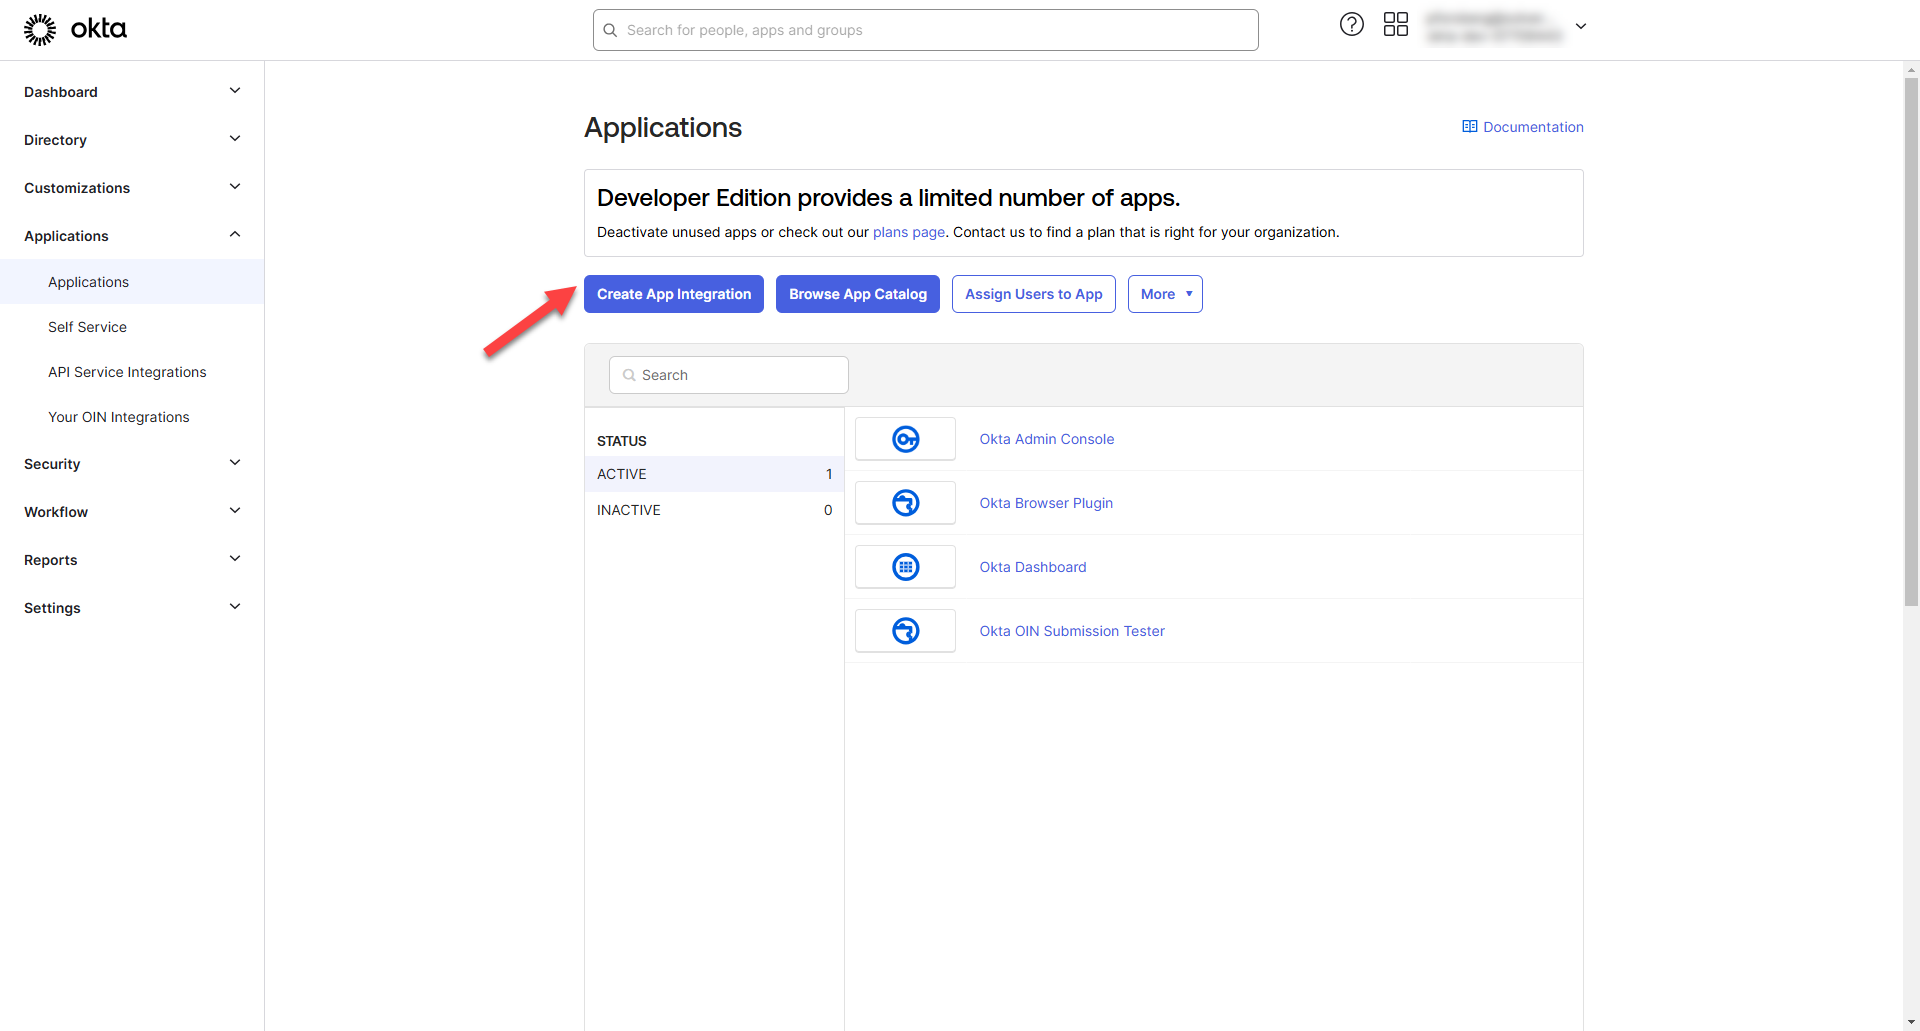
- On the left hand side expand Applications and click Applications.
- A listing on applications that you have created will appear.
- It is recommended to create a new app specifically for Solver. To do so, click Create app integration.
- In the popup that appears. you are creating a Web Application application type with OIDC – OpenID Connect sign in method.
- Click Next.
- On the next screen, you will need to define
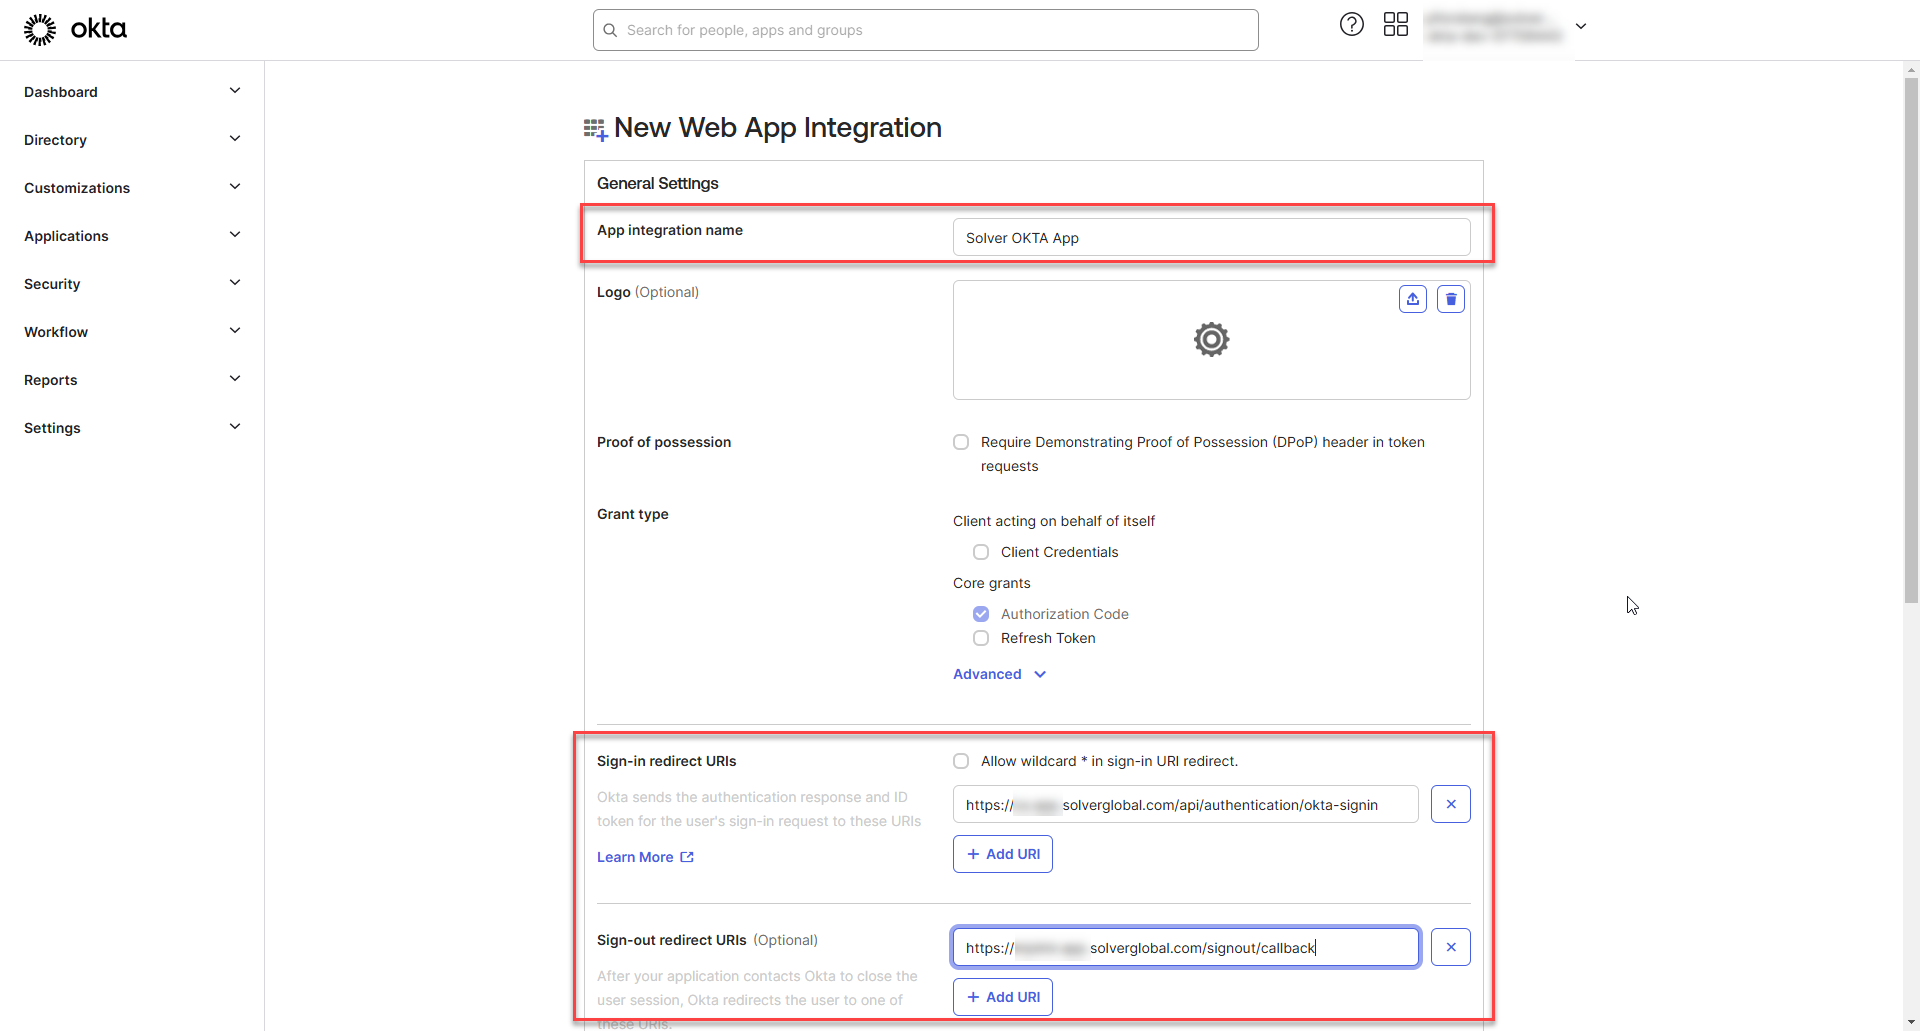
- App Integration Name: A descriptive name for this app. It is recommended to use Solver in the name you create to clearly identify the purpose of this app.
- Sign-In Redirect URIs: this is the URI provide in the popup when you enabled Okta in Solver. Please copy and paste this URI from Solver.
- Sign-Out Redirect URIs: this is the URI provide in the popup when you enabled Okta in Solver. Please copy and paste this URI from Solver.
- Assignments: Define the users that should be able to authenticate via this Okta app. You can allow all, choose groups or skip. If you skip, you must configure access later before Okta integration will work in Solver.
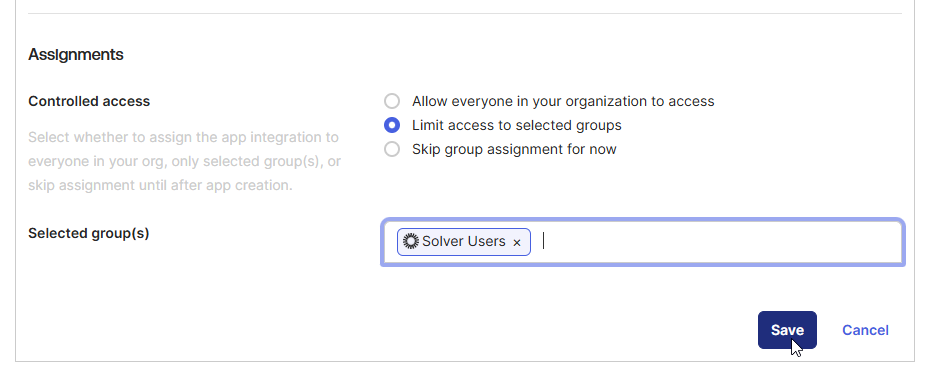
The Okta “Selected group(s)” textbox is case sensitive.
- Click Save.
- Upon clicking Save, the page will refresh and you app details will appear. No changes need to be made to this app unless you need at assign users.
Configuring an API Authorization Server Policy
Next you need to create the API Authorization Server Policy
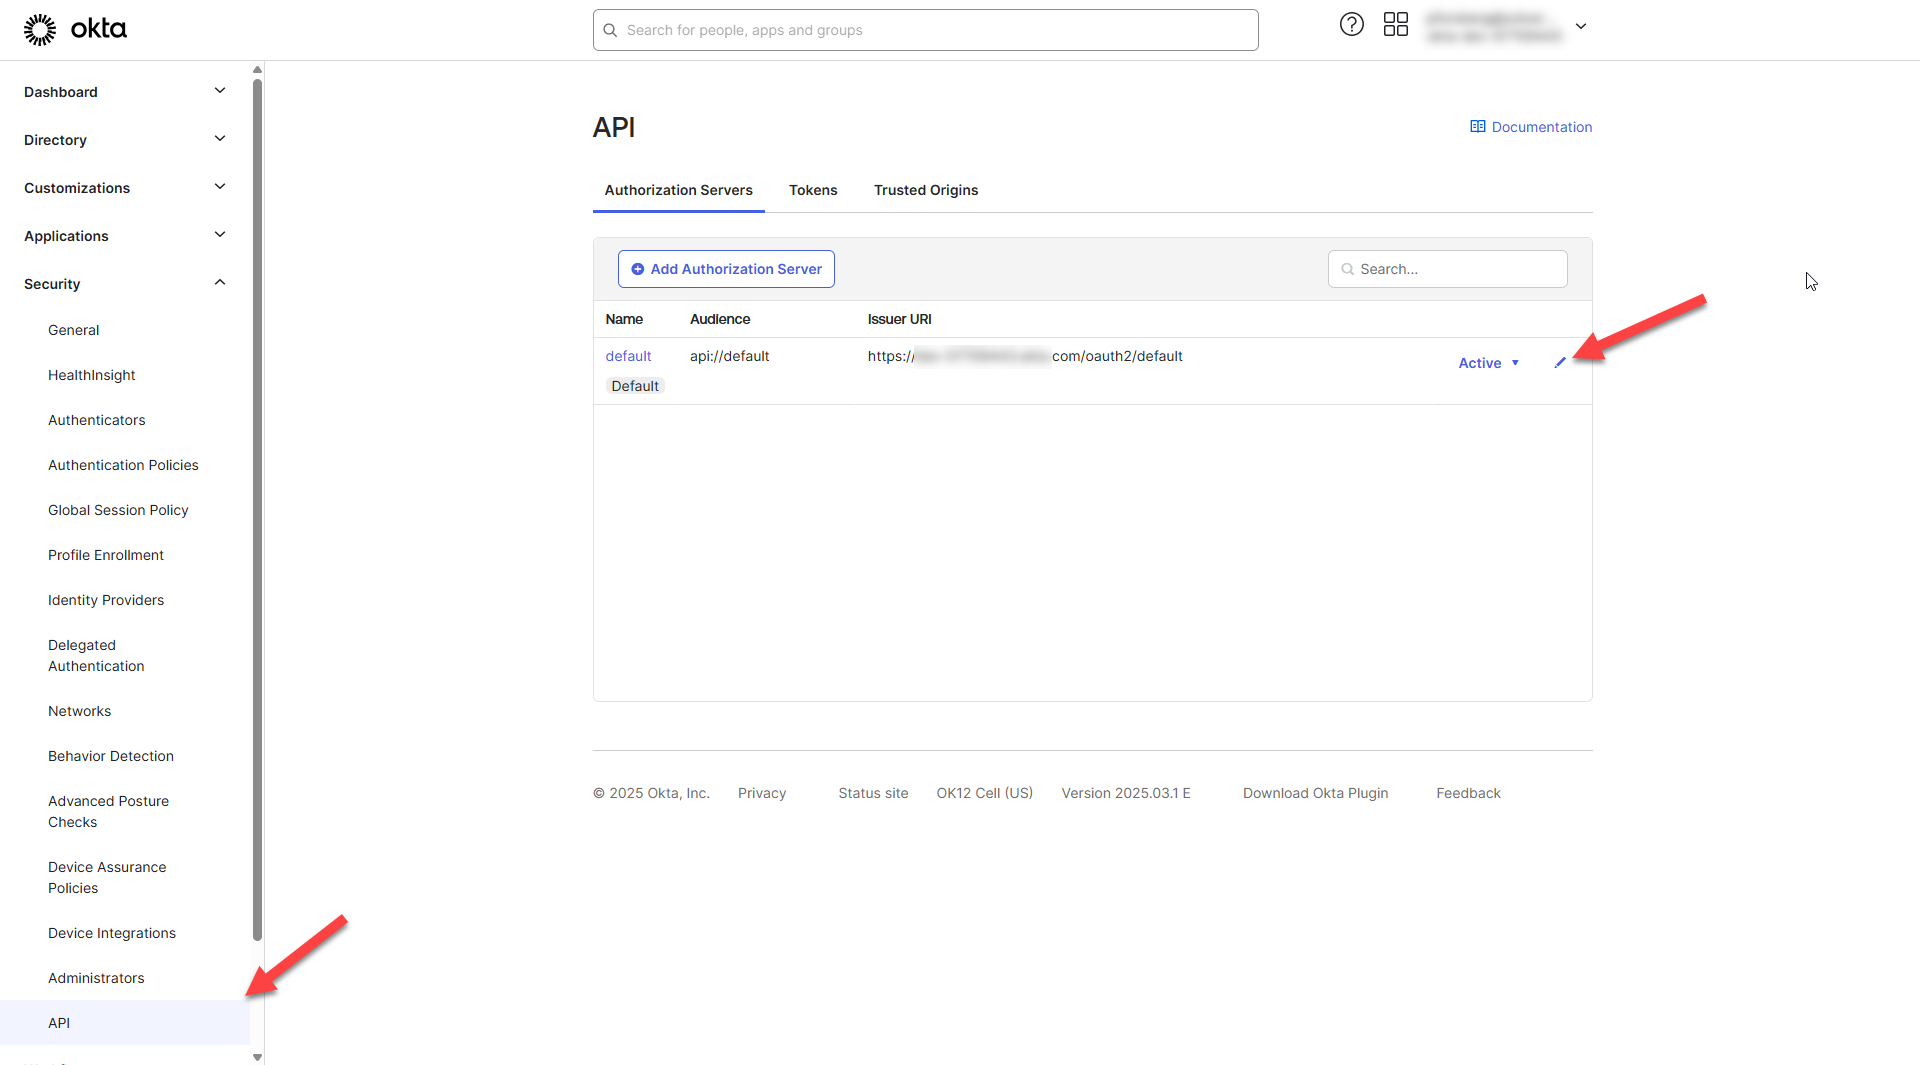
- On the left hand side click Settings > API and Choose to Edit the Default Authorization Server.
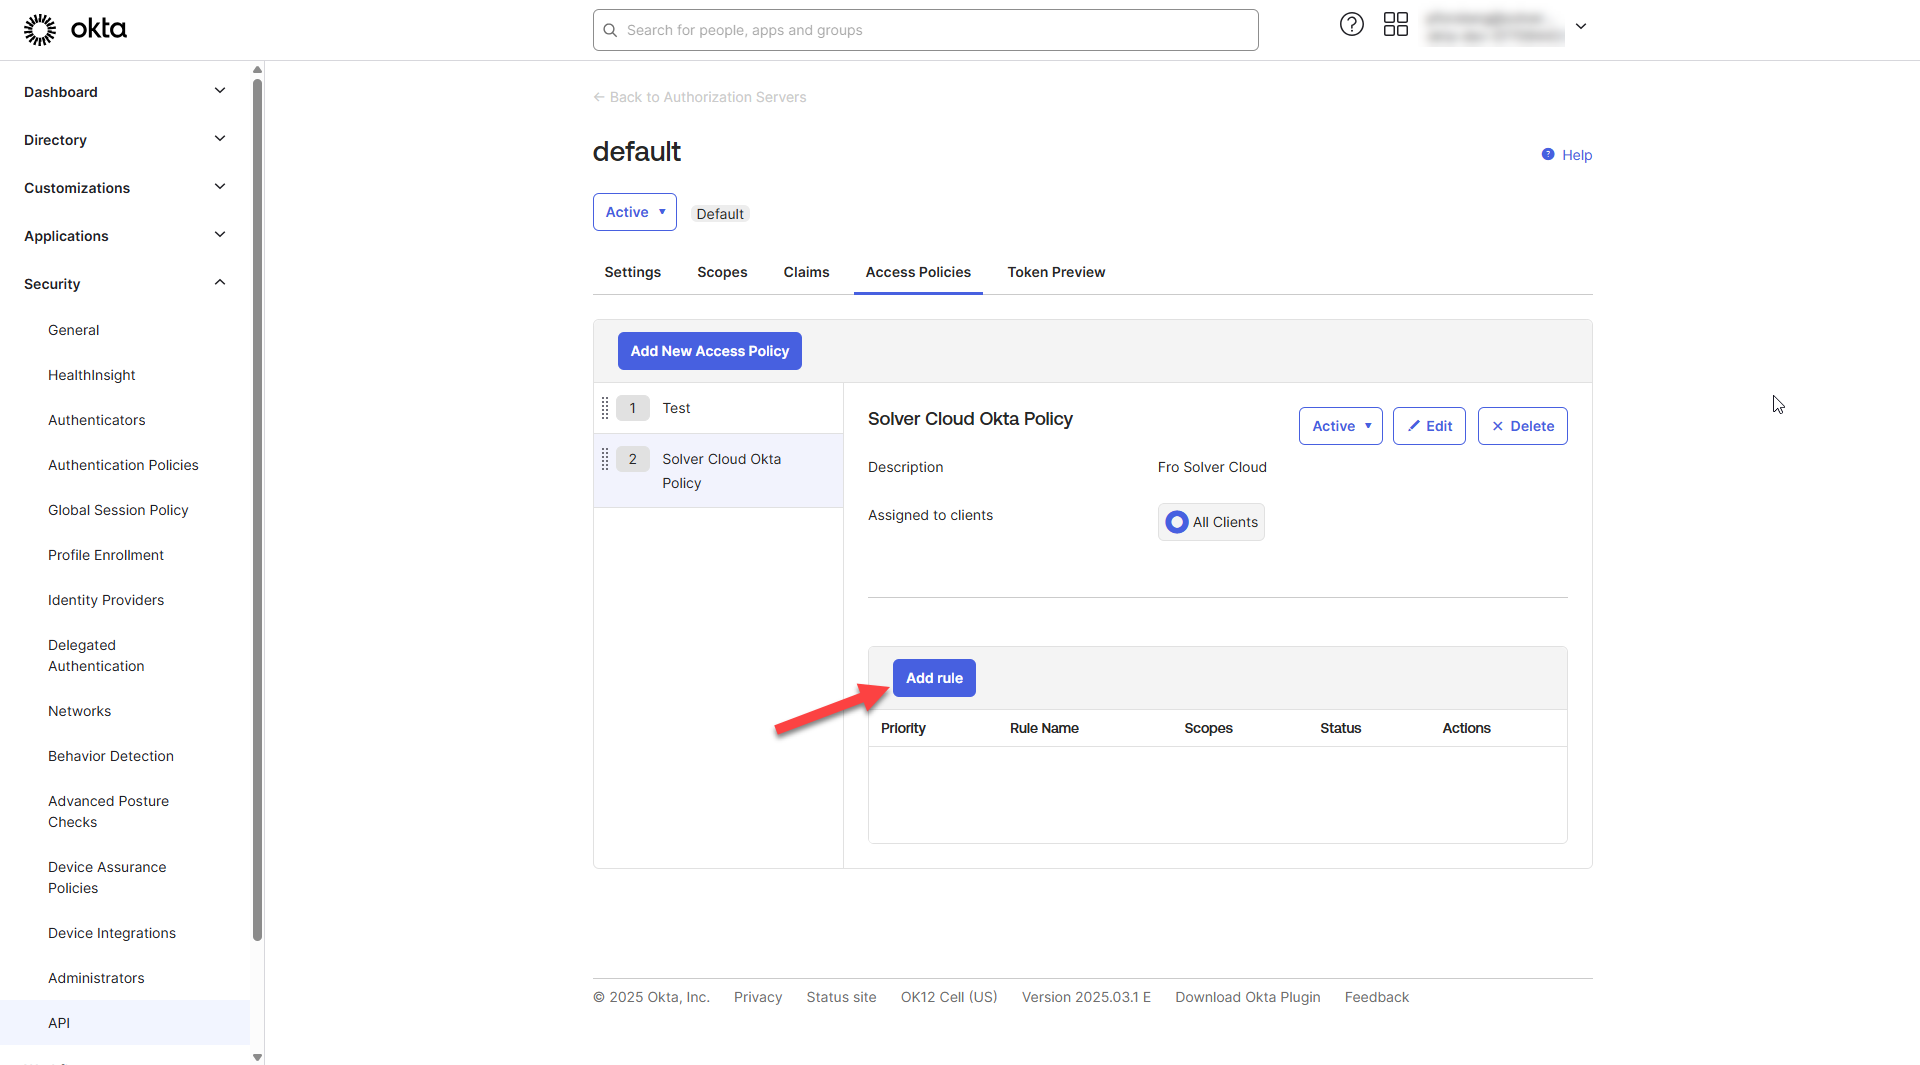
- Choose Access Policy > Add New Access Policy

- In the popup that appears, type in a descriptive name such as “Solver Cloud Okta Policy” and assign this policy to All Clients.
- Click Create
- Back on the Access Policies screen, Solver Cloud Okta Policy now appears. Click Add Rule.
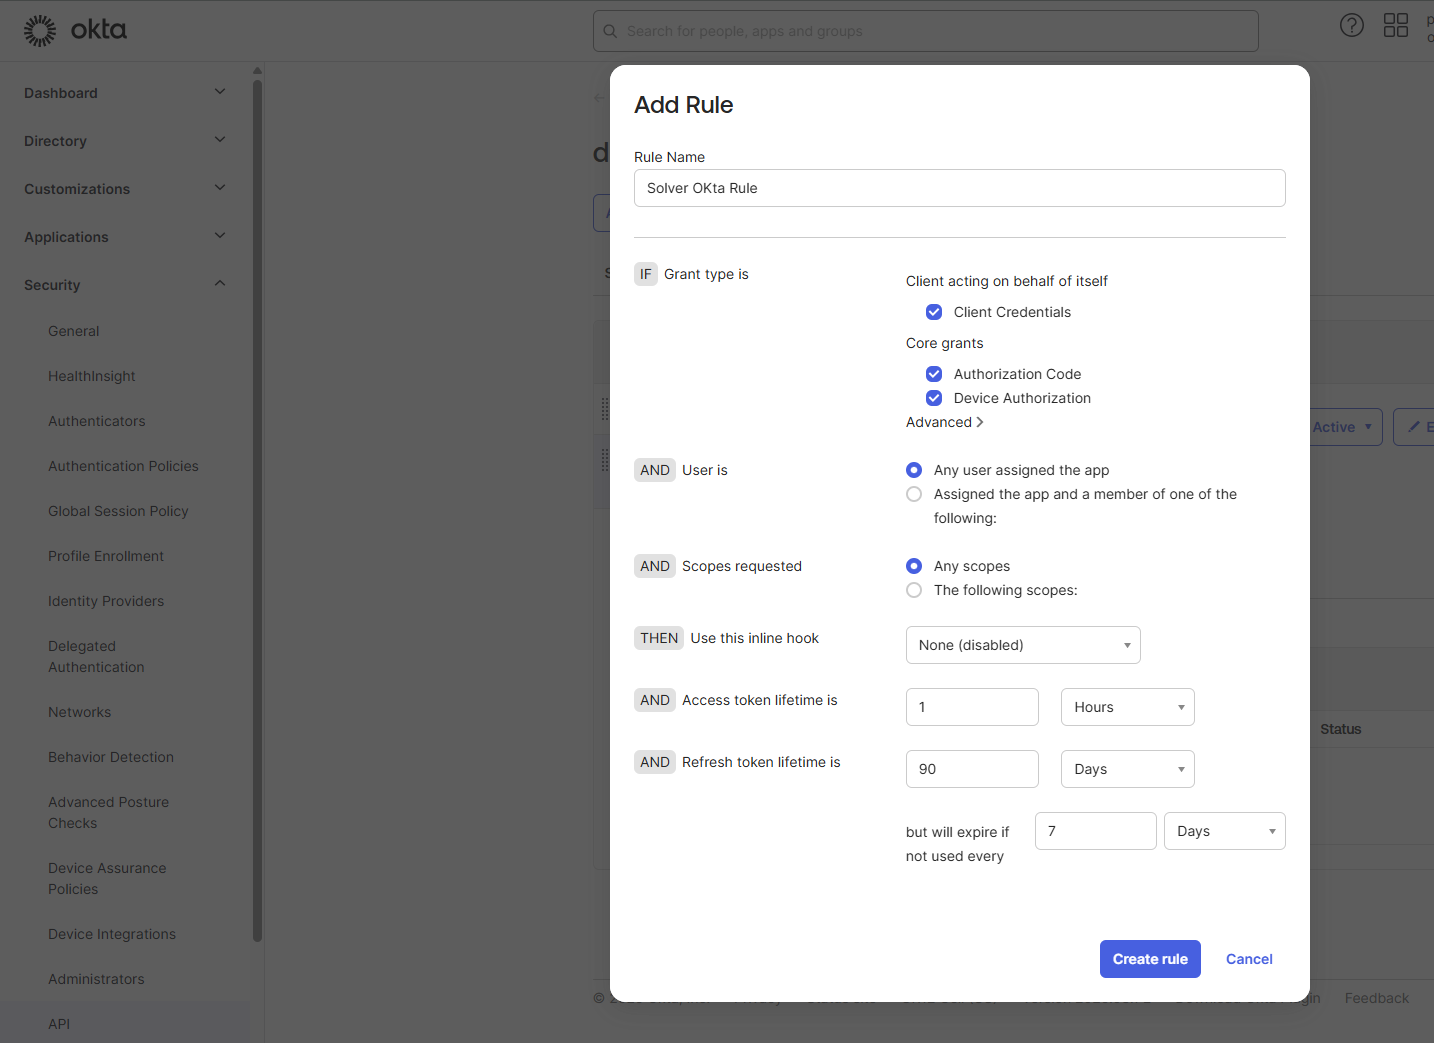
- In the popup, give the Rule a friendly name such as Solver Okta Rule. Leave the settings to default and click Create Rule.
This completes the configuration on the Okta Admin screens. Next return back to Solver and provide the above provided Authority Server, TenantId, ClientId and Client Secret.
- Solver defaults to tenantId.okta.com as the authority server to authenticate against. If your login to Okta does not match the tenantId.okta.com naming conventions, type in your Okta url.
- Your Okta TenantId: this is the tenant Okta has given you. You can find this by looking at your admin URL login and grabbing the string of characters before okta.com
- if you okta URL is https:mycompany-123-admin.okta.com, then you tenant ID is
“mycompany-123”
- if you okta URL is https:mycompany-123-admin.okta.com, then you tenant ID is
- On the Okta app you just created, in General tab, take note of your
- ClientId
- Client Secret
- Copy these values into their respective text boxes back in Solver and click Ok.
Client ID and Client Secret are never displayed in Solver after initial input.
Upon clicking Ok. you have successfully linked your Okta account to Solver.
End User Experience
Assuming that you have added users to Solver, once Okta is enabled:
- Navigate to your Solver URL.
- Type in your company email.
- Choose Sign in with Okta.
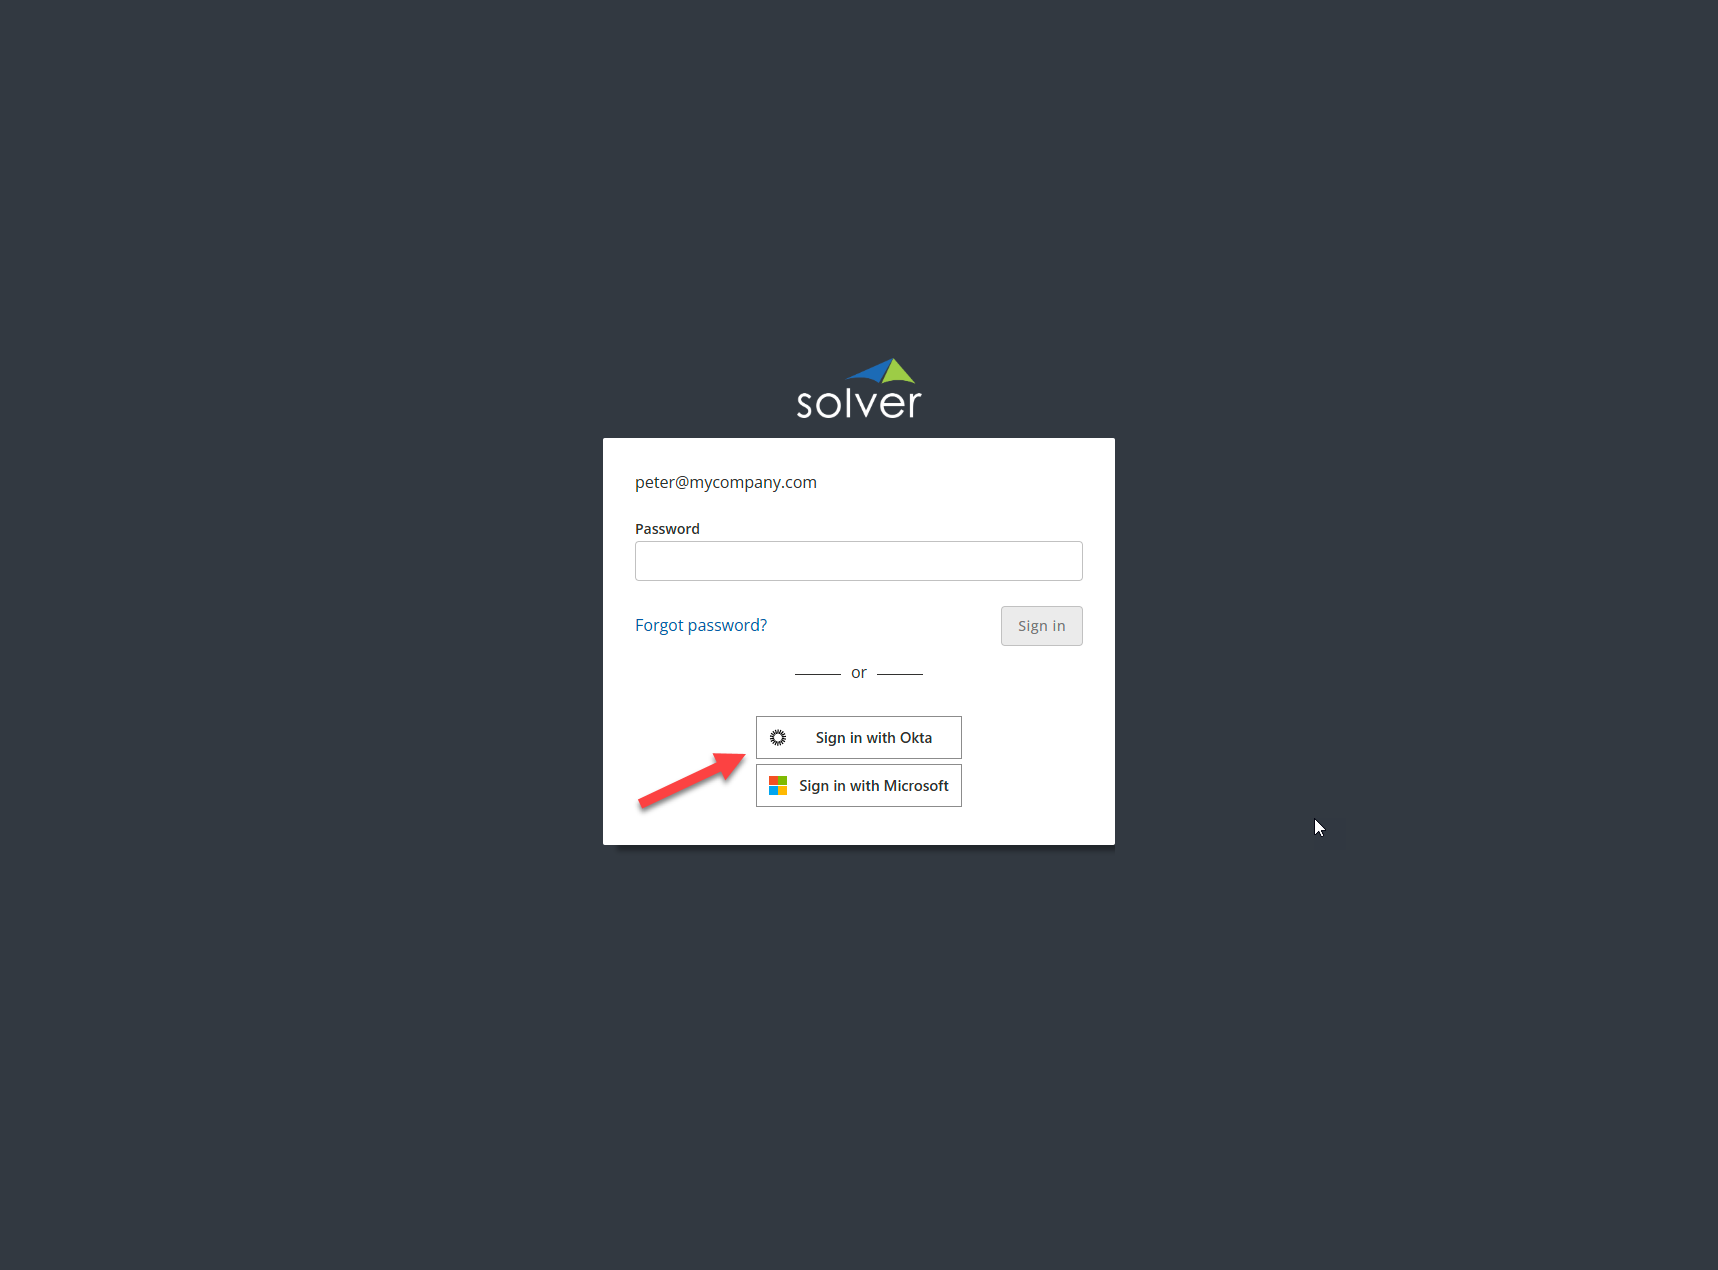
- You will be directed to the Okta sign in page where you will type in your email, password and MFA codes if applicable.
- Assuming the above information is correct, you will be successfully authenticated in Okta and redirected back to Solver and a logged in user with permissions to various features as defined in Solver.
Editing your Okta configuration in Solver
Edits to the Okta TenantId, ClientId and/or Client Secret can be made in Solver once configured on the Okta side. To edit your existing Okta configuration:
- As a Solver Customer admin, log into Solver.
- Navigate to Settings > Administration.
- Under Okta, click Change Settings.
- Only your Okta tenant id will appear. Make the appropriate changes and click Save.
Changing this configuration can impact who can authenticate with Solver via Okta. Please review these changes carefully.
Disabling Okta
Should you want to disable or remove Okta authentication:
- As a Solver Customer admin, log into Solver.
- Navigate to Settings > Administration.
- Under Okta, toggle off Okta. By doing this, your Okta information is completely removed from Solver.
- NOTE: Users may still be able to log into Solver if they have setup Portal authentication. To completely remove a user from Solver, you must also remove them from your users list.
Frequently Asked Questions
- Are Okta groups supported? Yes
- Why do I not see my groups when configuring in Okta? Okta’s auto search feature is case-sensitive.
- Are my clientID and clientSecret secure? Yes, this information is encrypted.
Troubleshooting
Upon trying to sign in with Okta, users receive the error
Your request resulted in an error. The ‘redirct_uri’ parmeter must be a login redirect URI in teh client app setting….
Resolution
This is resolved by adding adding the redirect URIs provided in the administration screen, in the app within your Solver App within your Okta implementation.