This article describes the process of using the dimension corrector tool for Business Central in cases where dimensions are missing.
In some cases, when using Solver’s Business Central (BC) connector, a user’s dimension and/or transaction data may not return results resulting in either an integration not completing or resulting in validation errors in Solver. This article will explain how users can use the Dimension Corrector tool found within their Business Central instance to solve this issue.
Identifying the Issue
If data is coming into Solver incorrect, you can verify that you need to run the “Correct Dimension Ids” prior to actually running it. The below steps identify how to confirm the issue.
- Log into Business Central.
- Using the search function within the BC website.
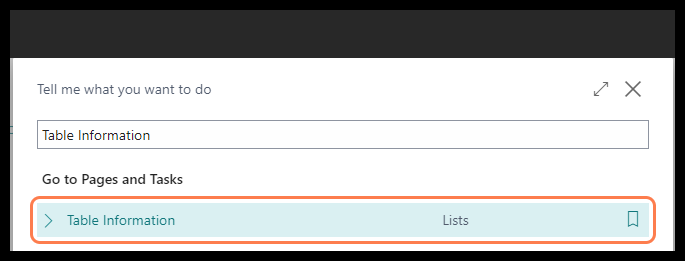
- Click the search icon at the top right corner of the landing page.
- Search for “Table Information” and select the result.
- Use the search in the Table Information page to find
- TableName = Dimension Values
- Table No = 349.

- Click on the No of Records value to get a list of all Dimension Values that exist for the company
- A list of your dimensions will load.
- Analyze this page, there are two things you are looking for in the Dimension Id column.
- There should be no {0000000….00000} entries.
- Amongst the dimension codes that belong to the same dimension, the Dimension Id should be the same.
If either of the scenarios described above exist in your tenant you need to run the Dimension Corrector Tool.
Using “Correct Dimension Ids” Feature
If you have confirmed that one of the above data issues is occurring in your Business Central configuration, you can proceed with using the Correct Dimension Ids feature in Business Central. This Business Central feature is typically a one time use tool and does not need to be ran regularly. If you are finding consistent issues with dimension data after running the Dimension Corrector, you should open a ticket with Microsoft to analyze your specific process to add dimension codes and assign transactions to that dimension.
- Login to BC as an administrator.
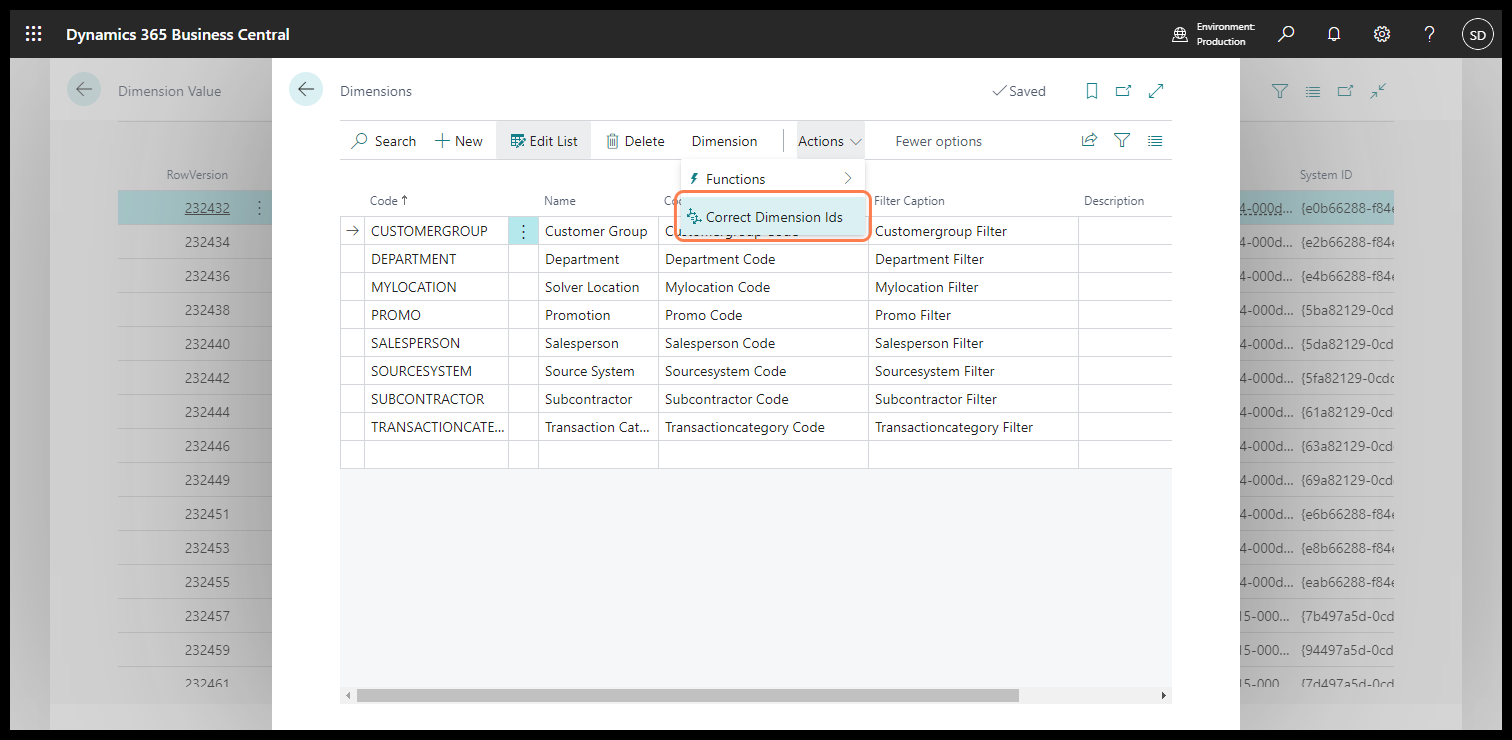
- Use the search icon on the top menu bar to search for and navigate to the “Dimensions” Menu.
- Click on the More > Actions menu button and choose Correct Dimension Ids.
- The process should take a few seconds. Once complete you will see a notification stating that the process has been successfully corrected.
How to Confirm the Correction:
You can verify that the issue has been resolved by:
- Returning to page 349 which was mentioned in the Identifying the Issue section above.
- Previewing or Rerunning your integration to validate that the full dimension data has come in.
You may need to delete the data that has been loaded into your Solver tenant.