Introduction
This article will detail the steps to set up and configure QuickStart for Sage Intacct. QuickStart is a wizard-driven process made to assist you in quickly setting up an integration from your organization’s Intacct implementation to Solver Cloud.
Before attempting a QuickStart integration with Intacct, there are a few items to be aware of:
- Users must be subscribed to Sage Intacct and have purchased an Intacct license before attempting an integration.
- QuickStart is available to new implementations only.
This QuickStart implementation will allow for rapid data integrations from Sage Intacct into your organization’s own Solver database. With this method, users will also be able to bring in specific types of data that are most important to them and leave out any data that is unnecessary for their reporting and budgeting needs.
Users should note that the basic QuickStart integration for Intacct that this guide has highlighted requires specific data brought in. This data is the minimum required components for a QuickStart using Intacct. For more information on the particular data available for this implementation, please reference this article on QuickStart features.
Pre-Configuration
Authorizing Solver
Before attempting to create a QuickStart integration, there are several steps that users must follow in order to ensure that their data will be correctly imported to Solver. This section will describe a few of these steps and link to other important knowledge-based articles with information on how to ensure the validity of the connection between Intacct and Solver.
It is important for users to first authorize Solver’s SenderID to make requests to your company’s data. Solver’s senderID is “Solver” (no quotes).
Configuring User Permissions
The following section details the process of adding a Solver connection to the Sage Intacct ERP.
This process must be followed in order to successfully create an integration between the two programs. Each user must follow these steps when setting up their permissions for the first time and these permissions can be edited at any time but any changes on the Sage Intacct side require a new integration to be set up and run in order to use this data in Solver.
For directions on how to configure your Intacct account to integrate with Solver, follow the steps found in this article about Sage Intacct.
QuickStart Setup Guide
Prior to attempting a QuickStart integration, it is vital that you create periods in the Data Warehouse if you have not already. Follow these steps to create your Financial Calendar in Data Warehouse. You will need to create, at a minimum, the prior year and current fiscal year with the Data Warehouse. Once this process is complete, you may begin your QuickStart integration.
To create a QuickStart integration:
- Navigate to the DW.
- Select the Data sub-menu.
- Click Integrations.
- Select the Add New button from the upper right-hand corner of this screen to open the connector marketplace.
- Select the Intacct icon.
- Click the Create QuickStart button.
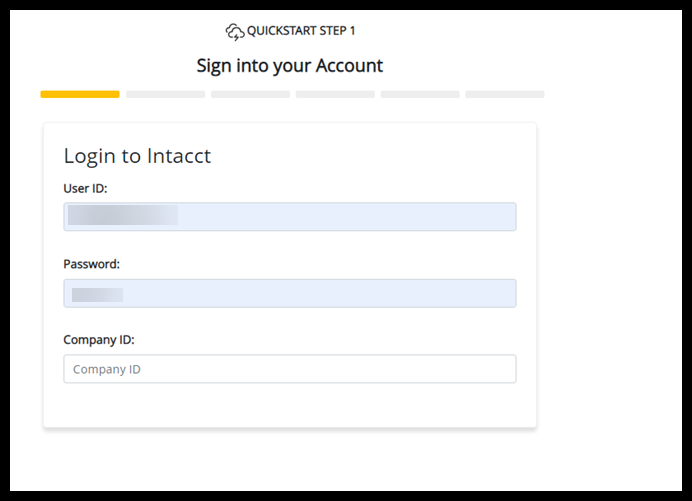
- Log in to Sage Intacct by entering your User ID, Password, and Company ID.
- Press the login button to continue.
*Please ensure that any pop-up blockers have been disabled for the Solver Cloud portal in browser settings.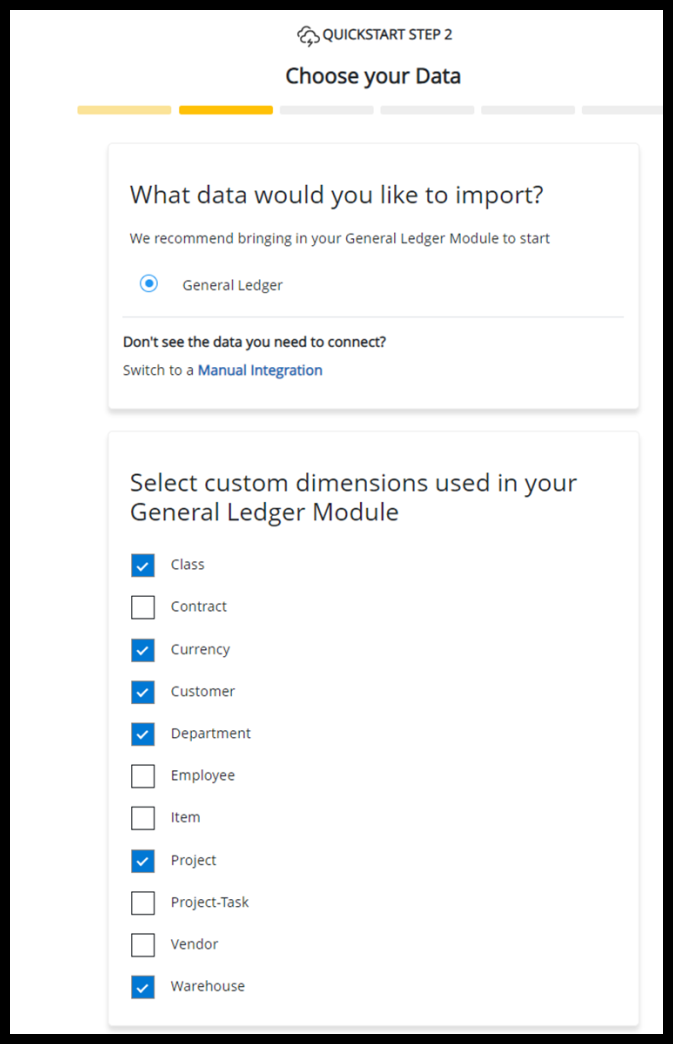
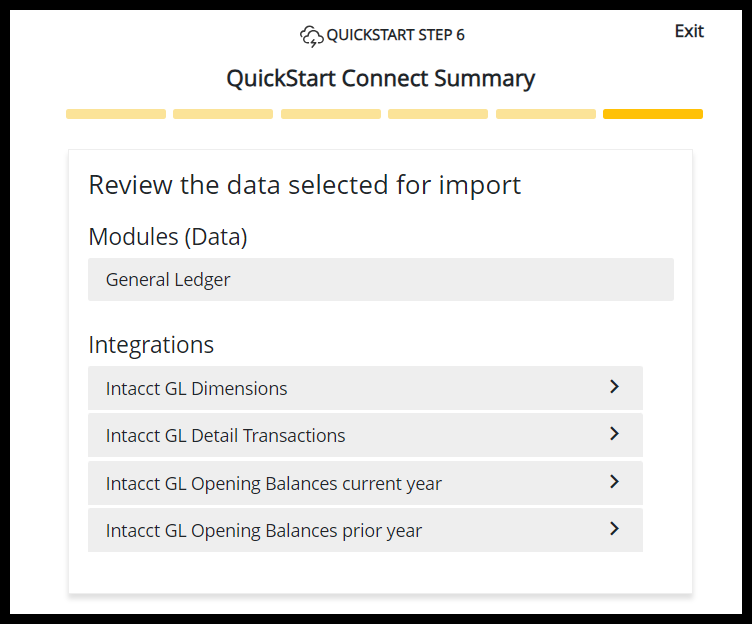
- Select the required QuickStart data.
- Select at least General Ledger and choose the Department dimension data for a standard integration.
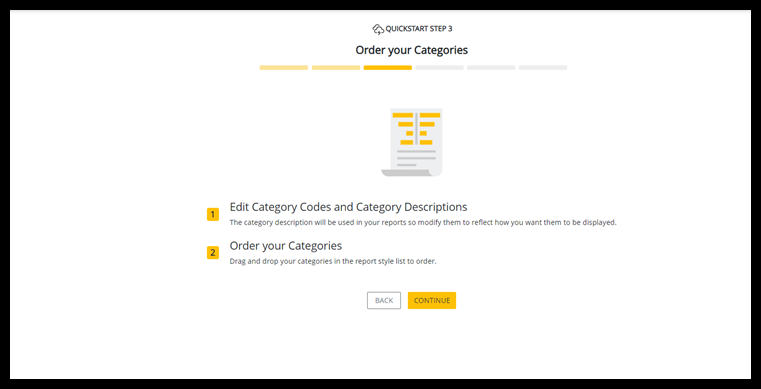
- Map your categories using the Mapping page.
This page shows a hierarchal view of a balance sheet and income statement reports in the main grid. For more information on how to use the Category Mapping page, see our article detailing this page here. - Complete this exercise for all account categories in use.
It is strongly recommended by Solver that users do the account category mapping exercise. By completing the account category mapping exercise, users get access to the Template Marketplace where “ready to use” reports are available for download.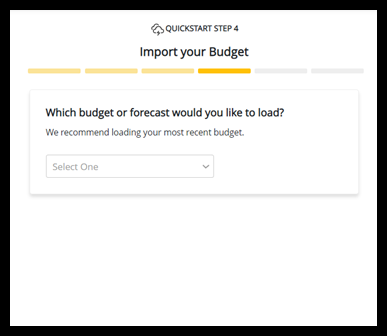
- Upload budget data from Intacct and will be given several options of the version of budget data that you would like to use.
- It is recommended to use the most recent budget data for optimal results.
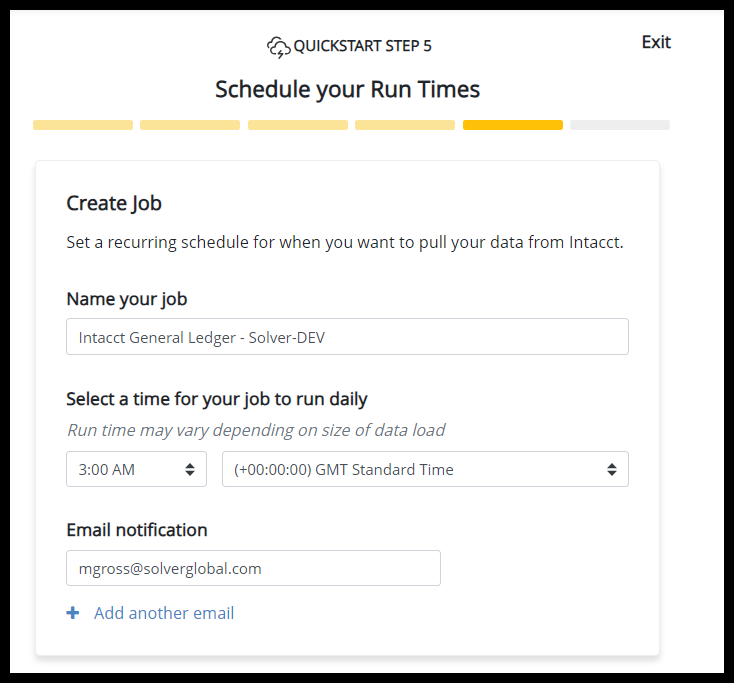
- Create a job to run the integration by selecting from the options on the next page in the wizard.
- Set up a name, runtimes, and frequency of the integration job as well as an email(s) for users who should receive integration status emails.
- Set up a name, runtimes, and frequency of the integration job as well as an email(s) for users who should receive integration status emails.
- Click Run to finalize your configuration and the data load process will begin.
This completes the process for setting up a QuickStart for Intacct. You have now successfully begun a process to load last year to the current period GL Summary and Detail data. On the Jobs page, you can view the status of the data load. Once complete, you can navigate to the Template Marketplace to install and run reports off your Intacct data in Solver Cloud.
Delta Load
This connector supports Delta Load for select source objects. Delta Load allows you to import only transactions that have changed from job to job, at a more granular level than just the period. This results in smaller data uploads and faster integrations. For detailed guidance on configuring and using this feature, see our Delta Load article.
More information
- Intacct performs maintenance every Friday from 7:30-11:30 PM Pacific time. Integrations may be impacted during this time and Intacct’s maintenance may run longer than expected. Please reference Intacct’s status page for more info.
- Please verify the allotted API limits your organization has.
- Solver’s Intacct connector and the speed at which you can load data into Solver are restricted by the terms of your Intacct purchase including the number of concurrent sessions your organization has access to.
- General Ledger, including beginning balance, is available in Intacct’s GLACCOUNTBALANCE endpoint. This endpoint requires that Reporting Periods are set to Budgetable.
- Please contact your Intacct administrator for assistance in setting this up.
- If you choose not to make your Reporting Periods Budgetable, Solver provides business rules that can create General Ledger data from the General Ledger Detail data.
- A separate account is strongly recommended as a user may be set into a “LOCKEDOUT” state by Intacct if logging in from multiple locations.
Stay tuned for more Solver updates in the future. For any issues, contact Solver Support at: support.solverglobal.com