Overview
Delta load, introduced to Solver in the Oct 2023 Cloud update, offers a way for customers to load in transactions that have been modified at a more granular level than just at the period level. Delta load supports transactions that have been updated or created
- Since the last successful job execution
- Up to 30 days back from the time of the scheduled or manual execution of the job.
Delta load creates smaller uploads, speeding up integrations and giving you the option to bring in only the most recent transactions versus an entire period’s worth of data.
Requirements
Delta load has the following requirements
- It is a connector and source object-dependent feature. This means that delta load will not be available for every connector and every source object. The delta load option will load if the source object of your integration does support delta load. A list of supported objects and field can be found at the bottom of this article.
- The delta load option in the job configuration will appear for integrations that have a single step, module task. Integrations with multiple steps will show a message asking users to split out the integrations into smaller steps.
- Period must be a parameter for the above-mentioned integration.
- The job must be run once before in order for the delta load option to appear.
- At the moment, users must have the latest connector version (click Add New from within the Data Warehouse) for each relevant ERP in order to use the Delta Load feature.
Configuration
To configure a Delta Load on an existing job:
- From the landing page, select the Data Warehouse menu option on the main application toolbar.
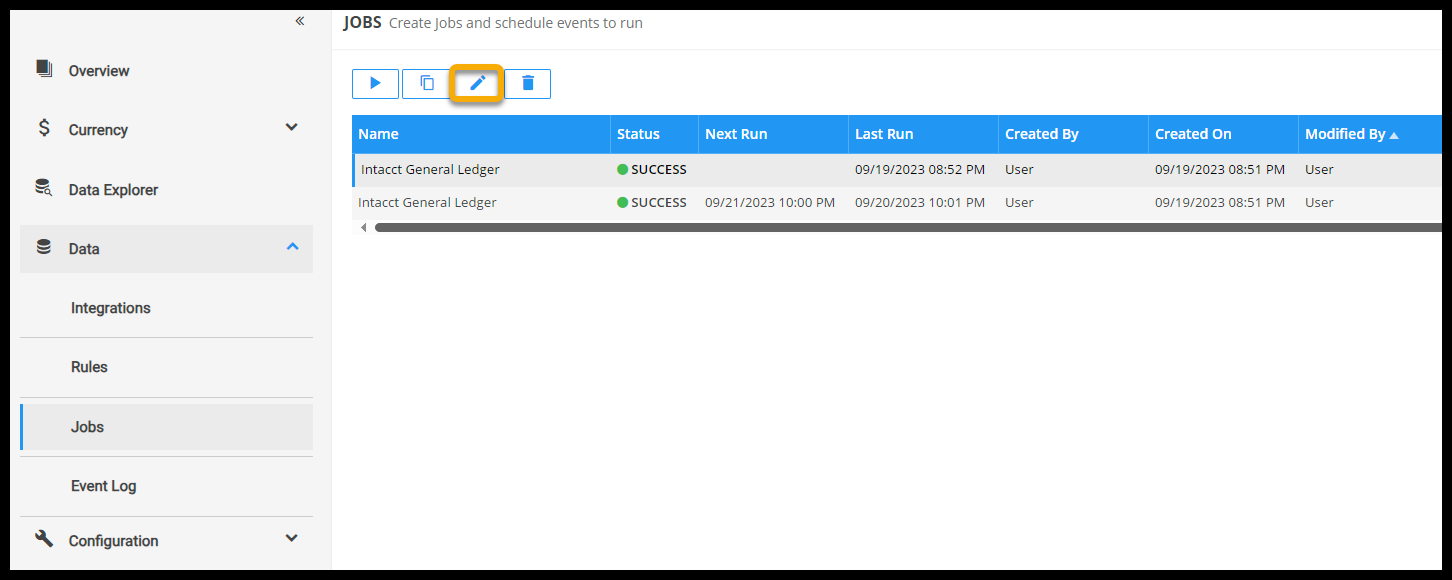
- Click on the Data submenu and navigate to the Jobs page.
- Edit an already executed job by clicking on the job you would like to use for your delta load and clicking the edit button above.
- From the Job Details page, select the icon under Parameters to set up job parameters for the chosen module.
-Currently, the only modules available to be used with this feature are GL Detail and GL Entry.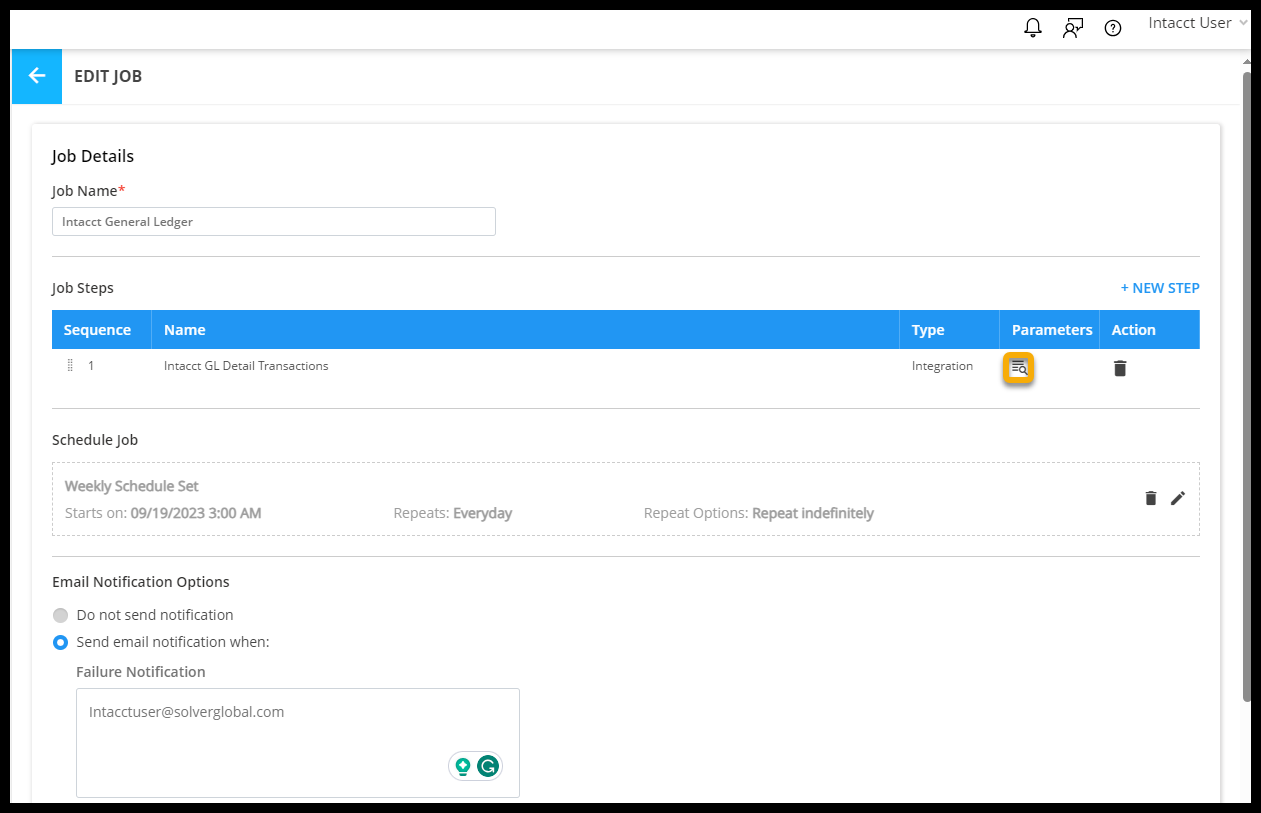
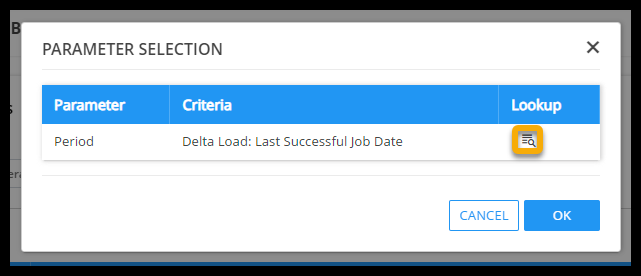
- Select the same icon under lookup to set the Period Parameters.
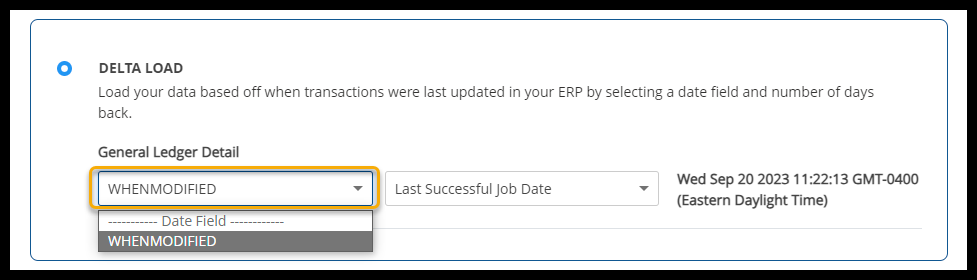
- Choose the Delta Load option at the bottom of the menu.
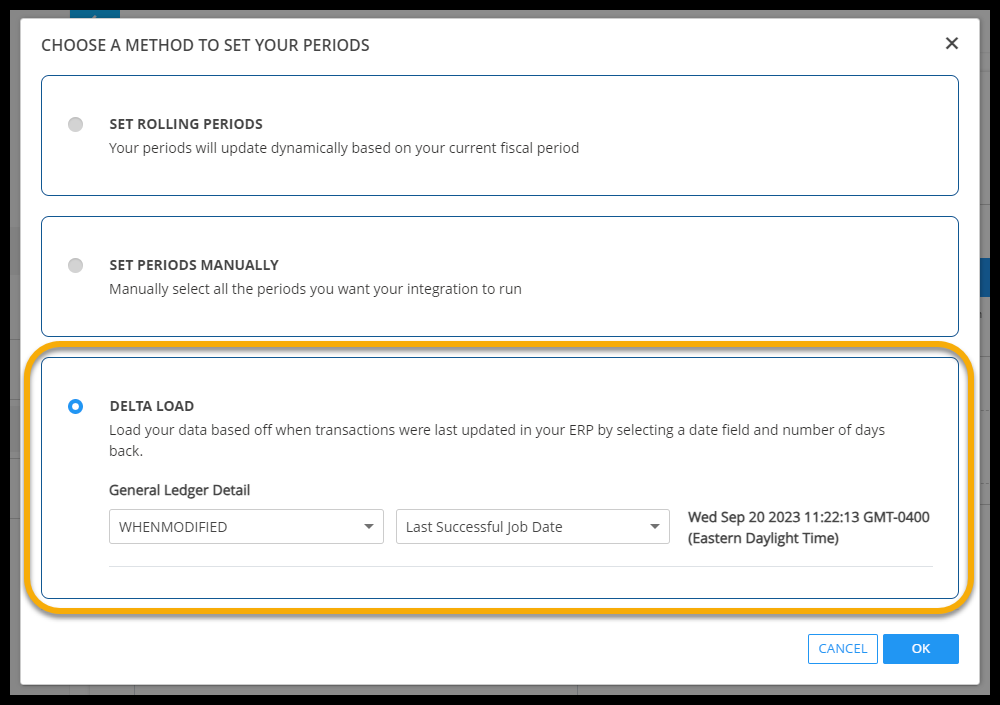
- Click the first dropdown and select from the options to choose which type of event you would like to base the delta load on. This will repopulate with the first option, which is the recommended field, however in some cases the user may be required to select from this list.
- Click the second dropdown and select from the options to choose how much data to load based on the amount of time since the previous data load or a specific number of days. Your choice will be shown with more detail next to this box once an option has been selected.
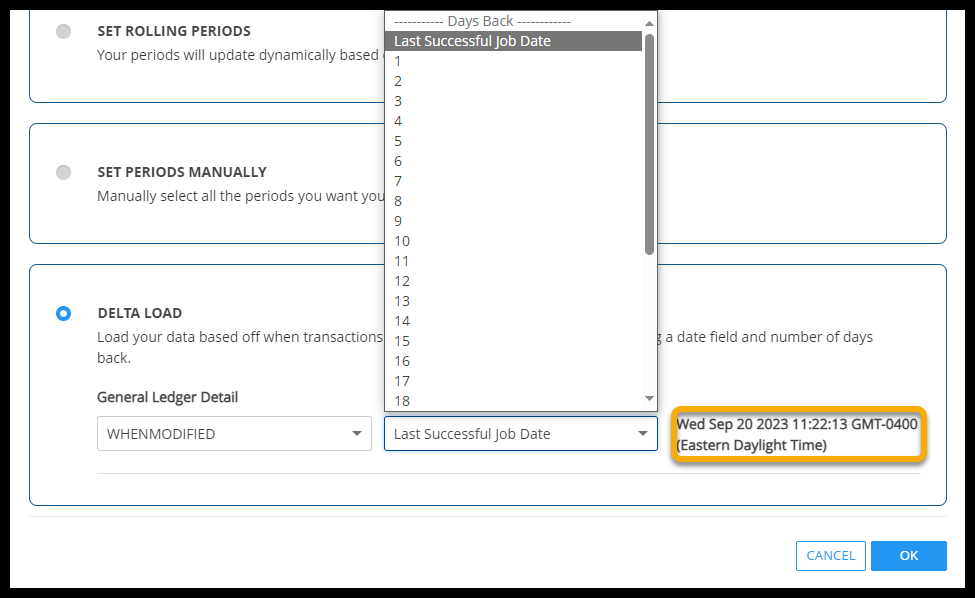
- Press OK to save your changes to the job.
Other Information
- Dimensions are not included in the Delta Load feature.
- This feature must be set up manually.
- Copy or duplicate a job with “Last Successful Job date” selected requires a user to change this option and run the job one time.
Current Supported Delta Load ERPs and Objects
| Connector | Source Object | Source Attribute |
|---|---|---|
| D365 Business Central v2 | customerLedgerEntries | systemModifiedAt |
| D365 Business Central v2 | generalLedgerEntries | lastModifiedDateTime |
| D365 Business Central v2 | glBudgetEntries | lastModifiedDateTime |
| D365 Business Central v2 | salesInvoices | lastModifiedDateTime |
| D365 Business Central v2 | salesOrders | lastModifiedDateTime |
| D365 Business Central v2 | vendorLedgerEntries | systemModifiedAt |
| D365 Business Central (ODatav4) | GLEntries | Last_Modified_DateTime |
| Sage Intacct | GLDetail | When Modified |
| Sage Intacct | GLDetail | Modified |
| Sage Intacct | GLEntry | When Modified |
| Sage Intacct | AuditHistory | Access Time |
| SalesForce | Opportunity | LastModifiedDate |
| SalesForce | OpportunityLineItems | LastModifiedDate |
| Zendesk | KB Articles | Updated_at |
| Zendesk | Tickets | Updated_at |